

Panasonic Releases LUMIX Webcam Software (Beta) for Windows / Mac
Panasonic has released the LUMIX Webcam Software (Beta) for Windows / Mac, a one-stop webcam software making it possible to use an applicable LUMIX camera via USB as a webcam for live streaming or video conferencing. The optimum output resolutions are 1280x960 or 1280x720 and no additional video capture card is needed.
At launch the following models are compatible: DC-S1H, DC-S1R, DC-S1, DC-S5, DC-GH5S, DC-GH5, DC-G9. The DC-G100/G110 will also be compatible in the future.
“LUMIX Webcam Software (Beta)” is provided as a pre-release version that is currently still under development. Please note that this software is not eligible for operation warranty and customer support.
LUMIX Webcam Software (Beta) web page with download link
https://www.panasonic.com/global/consumer/lumix/lumix_webcam_software.html
LUMIX Webcam Software (Beta) for Windows Operating Environment
OS
Windows 10(64bit)
CPU
Intel CPU of 1 GHz or higher
Display
1024 x 768 pixels or more
RAM
2GB or more
HDD
Free space of 200 MB or more for installation
Interface
USB 3.0/3.1
LUMIX Webcam Software (Beta) for Mac Operating Environment
OS
Mac macOS 10.13, macOS 10.14, macOS 10.15
CPU
Intel CPU of 1 GHz or higher
Display
1024 x 768 pixels or more
RAM
2GB or more
HDD
Free space of 10 MB or more for installation
Interface
USB 3.0/3.1
・Specifications are subject to change without notice.
July 2, 2016 Fireworks in Boston


One Day Workshop Schedule
ALL ONE DAY WORKSHOPS ARE TEMPORARILY SUSPENDED
Workshop details are available from the Registration Page.
Macro and Close-up Photography
Flash Photography, High Speed flash, creative lighting
Portrait and Lighting Techniques
Digital Photography A-Z. This is a one day three part course that will teach you camera basics, post processing and printing.
The Digital Darkroom - a course that covers image capture, asset management, processing and enhancement, output to print and web media. A one day program for digital image making workflow
Timelapse Photography, post processing and video assembly
If you have any questions or would like more information please call 617-759-0010 or email sv@shivverma.com
Please use this REGISTRATION link to register for these workshops.
ND Filters' Color Cast comparison - Vü 10 stop Sion, Lee 10 stop (Big Stopper) & Formatt Hitech 8 stop
The Lee Big Stopper was introduced in 2010 to compete with the Hitech 10 stop filter that was known to have flare and other issues. Subsequently Hitech reengineered their 10 stop filter and emulated some of Lee’s design features. In particular the the light blocking gasket. Soon Lee introduced the Little Stopper while Hitech developed a wider range of solid ND filters the Pro Stop line from 6 to 10 stops and in multiple sizes. Most recently I was introduced to the Vü system and hence this test as a comparison. I will do a full review of the Vü system in the near future.As I own the Lee Big sStopper and the Hitech 8 stop with the Hitech holder (I do prefer the Hitech to the Lee holder) I was keen to understand the differences in the way high f-stop ND filters impart a color cast when used. Hence this test. Please click on the images to see a larger version.The set up was fairly simple. Using a Sony A7R II and a Zeiss Batis 85mm f/1.8 lens set at f/2.0 and a base ISO of 50, shutter speed 1/125 sec. The light source was two Elinchrome studio strobes positioned to give a 1/3 stop exposure variation at the edges. The camera was focused on a white foam-core board with a X-Rite Color Checker Passport clamped to the upper right corner. Camera white balance set for flash rather than a custom white balance (5450 Kelvin) and an "as shot" tint of +9. I wanted to allow for any variation in the white of the foam-core board that is typically not 100% white be adjusted in post.The test exposure was made and the white balance adjusted in post using Lightroom - this is the image below. White balance adjustment yielded a temperature of 4750 Kelvin and a tint of -1: Next the strobes were adjusted to full power providing 8 additional stops of light. The ISO was adjusted to increase sensitivity by two stops while the aperture of the lens was kept at a constant f/2.0 for all the exposures. Each filter was tested for color cast only.
The Lee Big Stopper (10 stop ND)
The Lee Big Stopper (10 stop ND) was mounted and the image as shown below was captured. This is as a screen shot so as to show the RGB histogram. The info panel shows the reading from the center of the captured image. Values are R=219, G=229, B=243 In this next image the Info Panel shows RGB values from the lower third of the image. Values are R=187, G=203, B=222
 Next the image was white balanced in Lightroom WB to 8600 Kelvin and tint +43. Compensated for the color of the board and the lights the calculated readings are 7900 Kelvin and a +35 Tint adjustment.
 The Lee Big Stopper exhibits a heavy blue cast in both the center and the edges.
Formatt Hitech 8 stop ND filter
As I do not have a 10 stop Formatt Hitech filter, I chose to do the same test with the 8 stop that I own. As with the Lee filter before, here the info panel shows the reading from the center of the captured image. Values are R=234, G=238, B=236 In this next image the Info Panel shows RGB values from the lower third of the image. Values are R=209, G=220, B=212
 Next the image was white balanced in Lightroom WB to 5750 Kelvin and tint +52. Compensated for the color of the board and the lights the calculated readings are 5050 Kelvin and a +44 Tint adjustment.
 The Formatt HiTech 8 stop exhibits a heavy green cast at the edges but is more neutral in the center.
Vü Sion Q 10 stop Neutral Density Filter
The Vü Sion 10 stop ND filter mounted using The Vü professional filter holder (more abut this in a future post) and the same test was performed. As before the image captured is shown as a screen shot showing the RGB histogram. The info panel shows the reading from the center of the captured image. Values are R=235, G=235, B=239 In this next image the Info Panel shows RGB values from the lower third of the image. Values are R=211, G=214, B=219
 Next the image was white balanced in Lightroom WB to 5800 Kelvin and tint +13. Compensated for the color of the board and the lights the calculated readings are 5000 Kelvin and a +5 Tint adjustment.
 The Vü Sion 10 stop is very neutral in the center an has a negligible shift at the edges.In conclusion I am very impressed with the Vü Sion 10 stop and is near neutral rendering. My full review of this system is forthcoming.
TWiP Episode 453 – Hot New DSLRs!
Click here for the Youtube ChannelHere is the link to the TWiP page
Review of the Hähnel Captur Module Pro, Captur Module - IR and the Captur Receiver
Hähnel Captur Module Pro remote trigger with sound, light, laser and IR triggering. Hähnel of Ireland has replaced the wonderful Giga T pro with Captur Module Pro. Capture is high-speed trigger system that will provide remote triggering, intervalometer functions, delay triggering, long exposure and will will also work as an ordinary flash trigger.Some of the more interesting features are sound, light, laser and infrared sensors for high-speed or wildlife photography. What is even better is that the system has an auxiliary port. This allows you to use any third part triggering devices to be connected to the Captur Module Pro that in turn will trigger your camera.The basic kit comes as a set of two devices. A hand held control unit and a IR transmitter. You will need an optional wireless unit to control your camera wirelessly. The controller is a 2.4GHz transmitter with a range of 320 feet. It will work with either shoe-mount flashes or studio lights as there is a hot-shoe and a sync port. There are models for Nikon, Canon, Sony and Olympus/Panasonic. Best of all the modules all use AA batteries.Features:
- Captures Time Lapse Photography, High Speed Photography, Motion & Wildlife Photography
- Four built-in sensors (light, sound, Laser & IR). The package indicates five built-in sensors however there are four sensors (three windows) and an auxiliary port that can accommodate an infinite variety of sensors and triggers.
- Auxiliary port allows to connect 3rd party sensors such as pressure plates, humidity & temperature sensors
- Fully programmable timed sequences including delay, interval timer, exposure count & exposure length setting
- Shutter release button with autofocus, single & continuous shooting & bulb mode
- Connect wirelessly to camera using the Captur Receiver (sold separately)
Construction:The Captur Module Pro and the IR Transmitter are encased in rubber shield that covers the unit with the exception of the display and control face. Each has a 1/4 20 thread that lets you mount the units on a tripod, light stand or clamp. The IR Transmitter mounts inverted to protect it from the elements. The Capture Receiver is not rubber encased. Module Pro: The face of the unit has the display window, three buttons - Lock, Trigger and Start/Stop. Blow these is the four way rocker and a center “set” button. The left side has the cameras cable release port and the auxiliary port. The top has the microphone, IR sensor and Light sensor. The right side has a micro USB port that can be used to power the device, and the on/off switch. Note the micro USB port is covered by the rubber enclosure. The underside of the unit has the 1/4 20 mount and the battery compartment also accessible by removing the upper enclosure.
 The Module IR has a high/low switch on the front face and the 1/4 20 mount. The IR bean is emitter from the top of the unit.he On/Off switch is located on the left side and the batter compartment is in the bottom also covered by the rubber enclosure.
 The Capture Receiver has a flash hot shoe on the face a test button and an indicator light that flashes green when the unit is ready and turns red when the unit is activated. The left side has the remote trigger cabe port while the right has the On/Off switch. The bottom of the unit has a combination hotshot mount and a 1/4 20 mount. Also on the bottom is the battery compartment. Note: this unit does not have a rubber enclosure.Using the units:The handheld remote controller can be connected to your camera with a remote cable or wireless is used with the wireless receiver unit. The controller will allow you to configure various shooting scenarios that require precise delays and also works as an intervalometer for time-lapse photography. Unlike the Giga T Pro, Captur Module Pro will work as a conventional flash trigger in addition to the remote triggering functionality when paired with a Captur unit.The control unit has settings for Hours, Minutes and Seconds (HH:MM:SS) and a mode delay of 00:01 through 10:00 seconds (duration in 1/100th second). A 4 way rocker for modes and a central push button for setting the parameters. Buttons for triggering, start/stop and lock. There are four configurable options:
- Delay - lets you set an interval between the time the trigger is fired and the shutter is activated.
- Long - allows you to set a long exposure duration - the camera must be set to bulb mode. It is also possible to do long exposures without programming. This is achieved by depressing the release button for 3 seconds and the bulb function will lock and you can release the button. Depress the button once more to end the bulb exposure (long exposure).
- Interval 1 - is configured to set the interval between shots and then N1 sets the number of shots to take.
- Interval 2 configures the time between interval (Interval 1) activation sand N2 configures the number of times the Interval 1 and N1 sequence is repeated.
Using the Captur Module pro is easy if you are familiar with the Gia T Pro system. There is an online manual that is reasonable week detailed for those who have not used a Giga system or are new to Remote triggers and intervalometers.Configuring for various modes:All modes have some common options: sensitivity, amount of delay before the unit will trigger the shutter, the duration of shutter open when the camera is in bulb mode and the number of allowed activations. To enable a mode all you need to do is to press the Start/Stop button to start the process. A ready LED turns green and when the mode is triggered the LED turns Red as a verification.To set the mode, use the rocker switch to get to the sensor mode you want. The modes are in the following order:Sound mode- adjust the sensitivity of the sensor as needed.Infrared (IR) mode, (you need to use the Module - IR). Set the Module - IR and the Module - Pro so they are aligned with the IR beam lens in line-of-sight with the receiver window of the Module Pro. When the IR beam is interrupted the unit will be triggered. The Module IR has High/Low setting. Use the low setting for a beam length of 4.5 feet or less and the High for lengths greater than 4.5 feet.Light Mode - here the sensor is activated when there is a change in light level - bright to dark, dark to bright. Ideal for fireworks, lightning, or indoors with any light being turned on or off.Laser - this mode requires a laser beam to be pointed at the receiver window and works the same way as the IR beam but with a much greater distance between transmitter and receiver.AUX - this mode requires you to connect any triggering device to the Captur Module Pro via a 1/8” Tip-shield plug.Pricing:The Captur Pro Module is $120, Two receiver modules are $45 each; A pair of flash triggers not reviewed are $100 and the Capture Timer Module also not reviewed is $60.Conclusion:In my opinion the Captur system is probably the most versatile triggering system I have used and as it uses AA batteries it will last through extremely long time-lapse sequences without having to worry about a premature shutdown. The construction is solid as is the performance. In all of the tests performed the unit did not miss-fire.
Iceland - February 28 to March 7
 With the exceptional Aurora Borealis activity in Iceland, I am doing a 1 week photo tour and workshop that will be exceptional.From the western peninsulas of Snæfellsnes and Reykjanes to the exceptional south coast including the exquisite black sand beaches and icebergs in Jökulsárlón and surrounding areas this trip is designed for all levels of photographers. This trip is limited to a maximum 7 participants.All Iceland photo tours and workshops in 2014 and 2013 were fully subscribed within days so please register as soon as possible.CLICK HERE FOR DETAILS
Fog Photography - a new article in "Tips"
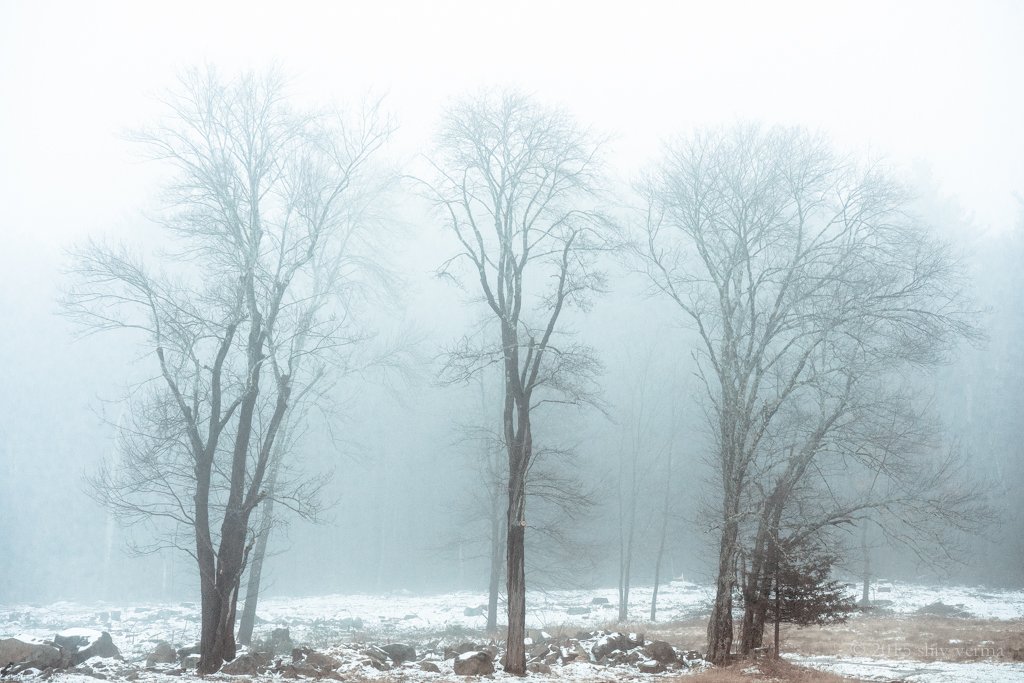 After the fog this weekend and some of the questions that have been asked, I have written an article on Fog Photography that you may find useful. The article is posted in the "Tips" section of my web. Click Here for the article.
What else is in my bag and more - Part 2
Here are some additional items I find useful. Some for the bag and others that are just good to have.
- Remote Shutter Release (wired or wireless) - A must have for tack sharp photography. There are 5 types available:
- A wired version that physically connects to your camera with a cable. Good for most photography when you are close to your camera.
- An Infrared trigger that is used to trigger the shutter using an IR beam (this requires you to be in “line of sight” to the front of your camera. These are usually OEM products but a few third-party devices are also available. I find these limiting.
- A wireless radio trigger. This is a two unit device - one is mounted and connected to the camera and the other is the hand-held controller. Hahnel and Phottix are the ones I use.
- An iOS or Android wired trigger. The smart phone is physically connected to the camera to trigger the shutter.
- The IOS or Android trigger. Here you use your smart phone and connect to the camera in WiFi mode to control and trigger the camera.
- Filter wrench (pair) - These come in two sizes and based on the lenses you have you may want to get both sets. Amazing how screw-on filters just don’t come off. The plastic wrenches allow you to apply pressure at the right places and lever the filter off so easily. Adorama branded wrenches are less than $5 a pair.
- LED Head Lamp - a must have when you are in the dark. Always carry one in your bag.
- Intervalometer - A must have device if you do any timelapse. long exposure, or multiple exposure photography. From basic wired devices to wireless units these are made most cameras including ones that have built-in intervalometers. Phottix, Hannel, Canon all make great units. Promote Systems makes a product called Promote Control, one of the finest devices not just an intervalometer but a whole lot more. The Promote Control will do focus stacking, automatic brackets of up to 45 images, with up to 9.0 EV step between shots for HDR. It can even automatically step into Bulb for night-time HDR! More expensive than the others but the Promote Control is my first choice.
Flash Photography:
- Flash Gels Filter gels are a great way to modify the color of your light but more important, they can balance the color temperature to match the ambient light. Roscoe and Rogue make excellent gels. My personal choice is the full set with the case and elastic band from Rogue. The Rogue set is around $30.
- Rogue Flashbender - These flash diffusers and reflectors are the best I have used. The come in multiple sizes and when used with the front diffuser, that act like a small soft-box. The cam be molded to direct light as needed or rolled up to form a snoot. These start at $20 for the Flashbender bounce card..
- Rogue Grid - If you need more control with the direction of the light from your flash the Rogue Grid is an excellent tool. The design features stacking honeycomb grids that produce 16, 25 and 45 degree grid spots. In addition you can get a set of bells that match the shape of the grid collar. The grid is under $50 and the gels will cost under $30
- Kupo Off-Camera Flash Alli Clamp - The clamp has a jaw that can clamp onto items up to 1.57" thick. Rubber nubs on the inside of the clamp prevent damage to paint or furniture. The clamp has a 5/8" receiver for light-stands or a 5/8" stud for super clamps with matching receivers. The Alli Clamp is topped with a metal locking shoe mounted to a rotating ball for your flash. I use it to mount my flashes, action cams, video lights and any other objects that need to held in place. Cost under $50. A lighter version called the Kupo Alli Clamp is for under $15.
Macro and Close-up
- Focusing rails and racks - These are ideal for precise positioning of a camera in X and Y directional axes. These come in single axis (front to back adjustment and 2 axis where a left right adjustment is also possible. Prices range for under $100 to $600 plus.
- Diopters or Close-up filters - This is one of the least expensive method of doing close-up photography. These filters attach to the front of your lens allowing you to focus closer hence magnifying your subject. They are available in single and dual elect construction. I recommend the dual element as you will have better optics. Prices range from $30 and up.
- Extension tubes - If you like macro these will allow your lenses to focus closer to the subject. As they have no optical elements in there is no image quality degradation. Kenko extension tubes are what I have and love. They come in a set of 12mm, 20mm and 36mm. For the newer mirrorless cameras the tubes are in sets of two at 10mm and 16mm
- McClamp The Clamp - This clamps to a tripod leg and can hold such items as gray cards and 12" reflectors, and small delicate subjects in place. It has a 26" flexible arm with a spring-loaded clamp to hold your subject in place. Wimberly also makes a similar device and have a new version called the Plamp II. Both products are about $45.
- Light Tent or Cube - A great light modifier for your product photography, food photography and macro work. These come in various sizes and cost $40 and up.
- Triflip (Trigrip) 6 in 1 or 8 in 1 reflector/diffuser - The TriGrip from Lastolite has a triangular shape with a built-in handle that allows easy hand holding or for attaching to a stand.The TriGrip is 30" at its widest point and collapses storage. I prefer this to the typical round diffuser reflector kits.
A few for those who dabble with video:
- LED Light Panels - these come in various sizes - remember to get one that is disable and has the intensity you need for your kind of video shooting.
- Variable ND filter - for those bright days when you need to slow your shutter down and keep your aperture wide.
- Shotgun microphone - DSLRs are great at capturing video. The audio on the other hand really is pathetic. The minute in-built microphones are really bad. So get a good starter microphone. A shotgun mounts on the hot-shoe and connects to the mic input port of the camera. My choices for a starter microphone is the Rhode Video Mic Pro with the Dead Cat for around $210
Please use the comment link on the top of this post to share with us some of your special items.If you do plan on getting any of these items please use my affiliate links on the right column of this blog post or use the Products and Discounts Page for additional links.
What else is in my bag - Part 1
Apart from cameras, lenses, filters we as photographers carry a number of gizmos to help our image capture. This is part 1 of my list of gizmos. These are all reasonably priced and many are less than $10. Most on-line photography stores carry these items and you should check them out.
- Gray Card – Get your exposure right. Available in cardboard and durable plastic these are one of the most valuable tools for your camera kit. The camera may be smart but it is easily fooled. It will under or over expose very bright or very dark scenes. You should use a gray card to set the exposure for much more accurate results. Some of the newer cards come as sets with a black and white card. This can also help you set your white balance. A step-up would be the X-Rite Color Checker Passport.
- High velocity blower - Never clean your lens without first blowing off any dust, grit or lint. The last thing you want is to scratch your lens as your clean it with a lens pen or lens cloth. A good blower costs under $10 - the one I like is the Visible Dust Manual Blower. Adorama and B&H have these.
- Lens Pen - This is another must have tool for your bag. There are many manufacturers and models available. The ones with a carbon bad need to be activated before each use. Others like the Allsop have replaceable tips. I keep an Allsop in each of my camera bags.
- Lens Cleaning Cloth - A good lens cloth is a must in your bag. Zeiss makes some of the finest and can be purchased from Walmart and B&H for $3 and up.
- 1 or 1.5 inch natural bristle soft painter's brush - An ideal too to get lager dust and sand particles off your equipment. Keep one in your bag - you will be happy you have it on those dusty trips.
- Small micro fiber or cotton hand towel - You never know when you will need it. These are great for wiping of moisture from your gear on those wet days. Grocery stores and Bed Bath & Beyond carry these.
- Spray bottle - You may not always get a dewy morning but you can create dew on flower petals and spider webs with a handy fine-mist spray bottle. Fine mist spray bottles can be found for under $2 at Amazon.
- Bubble level - A three axis bubble level for your hotshot mount will keep your horizons level. If you have an inbuilt electronic level in the camera then you can skip this tool.
- Elastic bands and small ziplock bags - You will find many uses for this combo. A lost lens cap can be a problem but not if you can put a ziplock bag around the front element and secure it with an elastic band. If your zoom lens tends to creep the elastic band can help keep it in place.
- Large garbage bag - During any outdoor shoot I always pack one or two large garbage bags in my bag or in the car. They are great when you need some rain protection, need to keep your equipment on the salty sand, need to lay down at ground level when shooting low to the ground. A black garbage bag acts as a great gobo when needed, translucent bags make great diffusers.
- Gaffer's tape - 1 inch width in black, a small roll is perfect to secure items when needed. This is a must have to tape down your lens at infinity when doing any astro photography. A small piece can be used to cover the eyepiece of the viewfinder, preventing stray light from spoiling the exposure. It is also a great all around repair tool.
- Parchment paper, issue paper, or rip (stock) cloth - A small piece about 4 inches square is good but larger pieces can be useful for other situations. You can tape this (using gaffer's tape to your flash to diffuse the light. If you keep a larger piece you can have someone hold it to diffuse bright sunlight while doing close-up or macro photography. Get parchment paper any kitchen or grocery store. rip stock can be purchased from a fabric store or on-line.
- White foam-core - This makes a great reflector, if you need a silver reflector keep some kitchen foil and fold it over the foam-core. You can use the foam-core as a gobo or even as a white background for small subjects. Staples, Office Max, Michael’s or A.C. Moore are ideal for this.
- LED Flashlight - a must have when you are in the dark. A great tool for light painting and when you need just that added light for filling in shadows or adding a highlight. My favorites are Coast and SureFire (SureFire lights are available from the SureFire website and Amazon). Others can be purchased at Home Depot, Amazon or Lowes carry great LED Lights
- Small notebook and a ballpoint pen - Journaling is key. Write down locations, notes, day and time of best light, etc. Draw sketches of what there is so you can come back for better images. If nothing else - you can use it to jot down names and contact info of fellow photographers you meet.
In the near future I will follow-up with additional items I find useful. Some for the bag and others that are good to have. In the mean time, why don't you use the comment link on the top of this post to share with us some of your special items.If you do plan on getting any of these items please use my affiliate links on the right column of this blog post or use the Products and Discounts Page for additional links.
Flash Sync Speed Limitation - a question from a subscriber
Question: "One thing I am curious about is the shutter with regards to off camera flash. Is there still a physical shutter that limits me to a max synch speed of around 1/200 of a second? Or have they moved to an electronic shutter that would allow much faster synch times?"
In order to appropriately respond to the question lets first understand how mirrorless camera sensors operate. Most mirorless cameras use CMOS sensors that contain light sensitive pixels arranged in rows. These sensors are always live as long as the camera is powered on and booted up. In the mirrorless world, the sensor information is being constantly fed to the LCD and/or the electronic viewfinder. When you press the shutter the following sequence takes place: a) the sensor is wiped clean electronically; b) next the sensor is turned on and receives light while the pixels record the information; c) now the computer in the camera reads the data collected by the sensor pixels to generate the image. This data is finally recorded to the memory card.We know that the sensor is sensitive to light and always receiving information. In order to capture a good image, the sensor should be restricted from receiving light while it is being wiped clean and then again when it is reading the data captured during exposure. As the sensor data is being read you do not want the pixel information changing with any new light that may fall on the pixels. So, for both these events, mirrorless cameras use electronic or mechanical shutters or a combination of the two.The electronic shutter works by first erasing all the pixel data on a row-by-row basis. Then new image information is gathered and the data is read by the computer on a row-by-row basis very similar to how a television picture is generated. All of this takes time, albeit just a fraction. The greater the number of pixels the more the rows of information and the slower the process. This limits the cameras from achieving high shutter speeds. For proper exposure these rows of pixels gather the same amount of light but do so a row at a time. The data is read at the same rate. The collective time determines the fastest achievable electronic shutter speed.We are aware that to expose properly for flash photography all the pixels must be “alive” and ready to receive data while the flash is on. If the row by row read process starts too early then you will get areas of dark under exposure. In order to properly expose for flash, the computer in the camera has to wait before it can start reading the data collected by the sensor. This wait time determines the highest sync speed for flash photography.As an adjunct to this, in order to achieve higher shutter speeds mirrorless cameras use mechanical second curtains. The curtain can rapidly close all light from entering the sensor while the computer reads the information. On the Sony A7 that has a 24 MP sensor, there are 4000 rows of pixels. The only way to attain shutter speeds of 1/8000 sec. is possible using a mechanical rear-curtain. On the 36 MP A7r however, there are 4912 rows of pixels. To attain speeds of 1/8000 sec. this camera needs both a front-curtain and a rear-curtain shutter. The MFT cameras like the Panasonic GH4 and the Olympus OM-D series have 16 MP sensors that have only 3456 rows and can achieve 1/8000 sec. electronic shutter speeds without the need for mechanical shutters..The Sony A7 has an optional mechanical front-curtain that must be deployed when using lenses of longer focal lengths at high shutter speeds.Unlike DSLR’s, the mechanical shutter on mirrorless cameras remains in an open state in both the powered off and powered on modes, allowing for live view data to be collected and displayed continuously.The highest flash sync speed is currently 1/320 sec on the Olympus OM-D E-M1 , 1/250 sec on the Panasonic GH4 and under 1/200 sec for most of the Sony cameras.Hope this explains why the current mirrorless technology is limited and high flash sync speeds are not feasible. If you have other photography related questions, please do not hesitate to ask and I will do my best to get you answers.
Time-Lapse Imagery - Published
 I am so thrilled. My book is finished and is available in the Apple Store. It is an interactive iBook/e-Book that can be viewed using iBooks on a Mac or on an iPad.I am working on an interactive PDF version for all non Mac and iPad users. This should be ready in a week or so.
![]()
BBF - Back Button Focusing

This week I saw a post on Facebook where a friend was talking about seriously starting to use Back Button Focusing. I know there are lots of opinions and articles on this topic but one more will not hurt. Please note, this has nothing to do with back focusing. Before we go to far into the BBF stuff let’s get familiar with camera focusing. Most modern DSLR Cameras have the ability to manually focus on your subject or automatically focus. Some lenses do limit you to manual focusing as they have no motors and electronics to drive the focusing elements.Automatic or Auto Focus has a few modes, One Shot, AI Focus and AI Servo in Canon speak and AF-S and AF-C in Nikon speak. There really should be some ISO standards for this kind of stuff.One Shot and AF-S basically means the camera will trigger the lens to auto focus on the subject, lock the focus for you to capture the image.AI- Servo and AF-C means the camera will trigger the lens to auto focus on the subject and then do its best to keep the focus on the subject while the subject is in motion.Canon has AI-Focus which is supposed to intelligently detect motion and trigger the appropriate auto focus mode, one shot of AI-Servo. This can be problematic so let’s leave it out of this article.No lets understand how we get this to work. By default your camera is set to focus and read the exposure when you half press the shutter button. Fully depressing the shutter button takes the picture. Not a bad way to do your photography.So what is the problem? If you have a static subject, and use center auto focusing point (it is the most sensitive AF sensor) you would half depress the shutter button. This action will initiate the auto-focus and then you will see or hear focus confirmation, now you can depress the shutter all the way and capture your image. Optionally, keeping the shutter button half depressed you can recompose and then press the shutter button all the way and take your image. This system works great for static subjects. Now you are trying to photograph moving subjects. You can’t half depress the shutter and lock focus and then take the shot because your subject will have moved and no longer in focus.You switch your camera to AI-Servo (canon) or AF-C (Nikon). You are capturing great action images and you notice a great subject that is static. You point your camera, focus and recompose – Oh! NO! you lost focus and more Oh! No! the opportunity is gone. What could you have done? You could have switched the camera back to One-Shot or AF-S or switched your lens to manual focus after getting focus and then pressing the shutter to grab the shot. This would definitely be too late.To overcome this issue you need to separate the focus initiation from your shutter release. Now you need to assign focusing to some other button. Typically this is one of the buttons on the back of your camera and hence the term Back Button Focusing or BBF.Using your custom functions or menu functions set your shutter to meter only, assign the AF-On button to initiate focus. Now you will use your thumb to depress the AF-On button to initiate focus and then use the shutter button to capture the image. There are two steps but well worth it.One of the greatest benefits is when you want to lock focus, you simply release the AF-On button. The lens will not refocus till you depress the AF-On button again. So for any action photography you can be ready for any motion and yet be in a position to lock focus when you need to.A huge benefit, you can leave your camera in AI-Servo or AF-C mode and never have to switch to One Shot or AI-S mode. When you use BBF, as long as the AF-on button is depressed the focusing system will remain active in follow focus mode tracking your subject (AI-Servo or AF-C), release the button and focus stays locked. So for stationary subjects, all you need to do is to tap the AF-ON button and focus system will focus and lock. Remember to release the AF-On or the camera will continue to try and refocus.Now once you set BBF you need to be aware that this will take some getting used to. Your fingers and brain need a major reset. You will miss a few good shots but once you are used to this system you will wonder why you have been wasting so may good opportunities.Warning for Nikon users: The back button focusing button AF-ON will not trigger the lens vibration reduction “VR”. The shutter button must be half depressed to trigger VR.
Metering Modes and How Your Camera Meter Works
My latest article has been published in Digital Photography School. Non DPS subscribers may read it using the link below. There are lots of excellent articles and product reviews available in DPS and they are all free.Click Here for the article
Balancing Color for Flash and Ambient Light Using Gels
So glad to see another one of my articles published in Digital Photography SchoolClick Here read the article
Cold Weather Photography Tips
 With temperatures in New England and other parts of the world, down in the single digits and below I thought it would be a good idea to provide some cold weather photography tips.
There are three key items to keep in mind:
- Going from warm into the cold
- Photographing in the cold
- Coming back in from the cold
Going from Warm into the Cold
Going out into the cold has minimum issues with your camera equipment but is a problem for you if you are not dressed appropriately. Layers of warm clothing are preferred rather than one inner and a thick outer layer. Good boots, hats, scarves and touch sensitive gloves or flip out photographer’s mittens are a must. Use chemical warmers in your boots and gloves to keep your extremities warm. Unless it is snowing, your camera and lenses need little additional protection. They will survive the cold once they come down to temperature. This is one time you do not need to worry about condensation - cold air carries minimum moisture. Carry carbon fibre tripods as they do not get as cold as the aluminum ones. Cover the upper legs with leg covers that can be purchased from any camera store. You can also tape hot-water pipe insulation that you can buy at you local hardware or plumbing supply store.
Photographing in the Cold
 So now you are out and your equipment is freezing as are you. Keep your camera inside your over garment - keep it warm as in extreme conditions you can end up with a frozen shutter (it is the lubricant that tends to freeze). You will soon realize that your camera’s battery has depleted and the camera stops working. Always bring a few spare batteries with you. Carry them in an inner pocket so your body will keep them warm. Swap out the depleted battery with a fully charged warm one and you are ready to shoot again. Cycle through your spares. The first battery you thought was dead will recover a decent charge when it warms up so you can repeat the process a few times.
Take your camera out from under your clothing when you are ready to shoot. Do not breathe on your camera, particularly the viewfinder. The moisture in your breath will condense on the eye pice and cause a loss of visibility and lost photo opportunities. If it is snowing heavily, use protective waterproof devices to protect your camera and lens. You can use plastic bags in a pinch. Always carry a lens brush so you can brush of any snow from the front element of your lens. It is good to periodically check for snowflakes. If the lens was warm and some snow starts melting then use a dry lint free cloth to wipe off the moisture.
Coming back from the Cold
 With your photography done it time to come back indoors or to the warmth of your car. Stop! The equipment is cold the indoor air is warm and moist - CONDENSATION is ready to play havoc with the camera and lens. What is worse, the humid air will penetrate all openings within your camera and lens. This condensation can be really detrimental to the electronics and mechanical components of your gear. Even if you own weatherproofed professional equipment you should still take precautions.
What you need to do is to let all this cold equipment warm up slowly while it is placed inside an air tight enclosure. Large Ziploc® or similar bags are ideal. If you do not have any of these bags you can place your equipment in your camera bag that can be zippered shut. Messenger style bags are not suitable. Put the equipment in the bag before you bring it into a warm area. Now any moisture will condense on the bag, not inside and no moisture will condense on your equipment.
Hopefully these pointers will help you and give you the opportunity for some great cold weather photography.
A Special Discount for LRTimelapse 3
 LRTimelapse 3 is one of the best time-lapse assembly software products available and works seamlessly with Photoshop Lightroom 5.For the remainder of 2013 and January 1, 2014 you can license or upgrade to any version of LRTimelapse for a 15% discount. This applies to upgrades and cross-grades too.A brief explanation of the options:
- If you still don't have any License, you can choose LRTimelapse 3 private and LRTimelapse 3 Pro. You can read about the differences here.
- If you have a LRT2 private license, you can get a discounted upgrade to LRT3 private or a discounted crossgrade to LRT3 Pro. For the latter, you will then save the cost of the update to version 3.
- If you have a license for LRT2 Pro (commercial), you will require the update to LRT3 Pro.
- If you already have upgraded to LRT3 private, you can crossgrade to Pro, if you need the advanced features.
Click Here and use the discount coupon code: XMAS2013LRT
onOne Software Announces Availability of Perfect Photo Suite 8
PRESS RELEASE:New Perfect Eraser for Content-Aware Fill, Enhance and Browse Modules, Perfect Batch Processor, and Re-imagined Effects Module Evolve Popular Plug-In Into a Complete Photo Editing Solution for Every WorkflowPortland, OR – November 26, 2013 – onOne Software, Inc., a leading developer of innovative digital photography solutions, today announced the availability of Perfect Photo Suite 8—the Photographer’s Choice for Photo Editing. Perfect Photo Suite 8 is a full-featured, standalone photo editor that also integrates seamlessly with Adobe Photoshop, Lightroom, Photoshop Elements, and Apple Aperture. It includes all the best tools a photographer needs to create stunning images.Key new features include the Perfect Eraser, with content-aware fill technology; the Perfect Enhance module for essential photo adjustments; a new Browser that streamlines direct access to images wherever they are located; the Perfect Batch engine that applies presets to multiple images with a single click; and a re-engineered Perfect Effects module, with twice as many adjustable filters, customizable presets, and integrated FocalPoint technology. These new tools and capabilities alongside Perfect Photo Suite 8’s eight modules, one-click presets, tools for automated enhancements, and powerful controls allow photographers to enhance, retouch, and stylize images in a layered workflow, replace backgrounds, create high-quality enlargements, and prepare images for output—giving them the ability to express their creativity and transform their photos quickly and easily.“We are extremely excited about Perfect Photo Suite 8,” said Craig Keudell, president of onOne Software. “This version is the result of what photographers have been asking for, not only from us but from the industry as a whole. We’re grateful for the contributions and feedback the photography community has invested in our effort and we believe that we’ve created an extraordinarily powerful image editing tool that meets their specific needs in return.”After a successful public beta program for Perfect Photo Suite 8, many photographers had a chance to try out the new version and give their feedback. “The attention to your user’s needs is unmatched,” said Rebecca Lyyski, owner of Lyyski’s Designs. “As a graphic designer and photographer with an elevated workload, your product has made editing my professional photography a pleasure instead of a chore,” she adds. Greg Lambert, public beta user and onOne Software photo contest winner shared, “Perfect Photo Suite 8 continues to evolve by refining its existing capability, streamlining the interface and providing some new and exciting tools and presets to enable photographers to produce the images they visualize when they press the shutter button.”The New Perfect Photo Suite 8 Features:• Eight integrated modules – Effects, Enhance, B&W, Portrait, Mask, Layers, Resize, and Browse. Each module is designed to target a specific image-processing task. Together, they help photographers enhance, retouch, and stylize images in a layered workflow, replace backgrounds, create high-quality enlargements, and prepare images for use in various capacities.• New Module! Perfect Enhance provides essential tools for basic enhancements, such as brightness and contrast adjustments; colorcast, dust spot, and power line removal; and the addition of vignettes. It is an ideal module to start with when using Perfect Photo Suite 8 as a standalone application or when quick corrections are needed.• New Module! Browse provides convenient and direct access to image files wherever they are stored—whether they are on a computer, an external drive, a connected network, or on a cloud-based storage service like Dropbox, Google Drive, or Apple’s Photo Stream.• Reimagined! Perfect Effects – As a cornerstone of Perfect Photo Suite 8, the Effects module has been redesigned by adding adjustable filters and customizable presets, making it the most powerful and versatile image stylization tool available on the market today.• Twice as Many Adjustable Filters to create the most sought-after looks, including:• Dynamic Contrast – Adds stunning clarity to images and makes them pop by exaggerating the levels of contrast, without sacrificing highlight and shadow detail, creating halos, or affecting saturation.• Lens Blur – Includes the best parts of FocalPoint technology to create bokeh, tilt-shift, and selective focus effects after the shot.• HDR – Gives images the edgy look of high dynamic range. Settings are adjustable and create effects that range from subtle to surreal.• Vintage – Turns photos into a nostalgic memory with retro-style filters.• Powerful brushes provide the right results for specific editing tasks:• Perfect Eraser removes objects with content-aware fill technology• Retouch Brush uses spot healing to remove small distractions• Clone Brush removes unwanted items by replicating and covering specified areas of an image• Masking Brush reveals underlying layers or selectively applies effects• Perfect Brush delivers precise edge-detection masking• Hundreds of Customizable Presets are available throughout Perfect Photo Suite 8 that make it easy for any photographer to instantly create an image they love. Presets can also be used as starting points for creativity and efficiency. Presets are included in the Enhance, Effects, B&W, Portrait, and Resize modules.• Improved Masking Bug in the Effects and Layers modules make mask creation easier and more intuitive.• Perfect Batch engine simultaneously applies presets from multiple modules and a watermark to a selected group of images.
Availability and PricingThe new Perfect Photo Suite 8 is now available by clicking on the logo below.jpg)
Perfect Photo Suite 8 is available in three editions: Premium, Standard, and for Adobe Lightroom & Apple Aperture.The Premium Edition works with Adobe Photoshop, Lightroom, Photoshop Elements, Apple Aperture, and as a standalone application. It is priced at $179.95. Owners of previous versions of Perfect Photo Suite Premium Edition can upgrade for $99.95. For a limited time, orders of Perfect Photo Suite 8 Premium Edition will include a special collection of Professional Presets and The Essential Video Guide to Perfect Photo Suite 8, which provides a comprehensive collection of getting started training videos for Perfect Photo Suite 8—for free ($80 value). This offer ends on December 3, 2013.Perfect Photo Suite 8 for Adobe Lightroom & Apple Aperture works with Lightroom, Aperture, Photoshop Elements, and as a standalone application. It is available for $129.95; upgrades are $79.95. The Standard Edition works as a complete standalone photo editor and is available for $79.95. For more information on Perfect Photo Suite 8, please visit http://www.ononesoftware.com. A 30-day Money Back Guarantee backs all onOne Software products.About onOne SoftwareonOne Software, Inc., is a leading developer of innovative software tools and apps for digital photography and offers time-saving software solutions for photographers of all levels, from enthusiasts to professionals. Leveraging its extensive history as successful plug-in developer for Adobe Photoshop, Photoshop Elements, Photoshop Lightroom, and Apple Aperture, and continued development of cutting-edge technology, onOne publishes unified solutions that offer both full-featured photo editing capabilities and the flexibility of traditional plug-ins. Founded in 2005, onOne Software is a privately held company located in Portland, Oregon. For additional information, visit www.ononesoftware.com.Press Contact: Amy Chan, onOne Software, achan@ononesoftware.com, 503-968-1468 x 137General Press Inquiries: press@ononesoftware.comOnline Press Center: www.ononesoftware.com/pressonOne Software Blog: www.ononesoftware.com/blogFacebook: www.facebook.com/onOneSoftwareTwitter: www.twitter.com/onOneSoftwareGoogle+: www.ononesoftware.com/plus©2013 onOne Software, Inc. All rights reserved. onOne Software, the onOne Software logo, and Focused on Photography are registered trademarks and Perfect Photo, Perfect Enhance, Perfect Effects, Perfect Eraser, Perfect Batch, and FocalPoint are trademarks in the United States and are the property of onOne Software. Adobe, Photoshop and Lightroom are registered trademarks of Adobe Systems, Inc. Apple and Aperture are registered trademarks of Apple Computer, Inc. All other trademarks are property of their respective owners.
One Day Workshop Schedule for December 2013
Here is the schedule for the remainder of 2013. Please use this REGISTRATION link to register and pay for these workshops. Please also fill out and mail or bring with you the Workshop Registration and Waiver Form This is an electronic form, you may print it and then fill it out or fill it out directly and then print the required copies.Click on the links for detailed PDF documents.December 7, 2013 - Photography Basics a one day class December 8, 2013 - Time-Lapse WorkshopDecember 21, 2013 - Lighting WorkshopDecember 22, 2013 - Macro and Closeup PhotographyIf you have any questions or would like more information please call 617-759-0010 or email sv@shivverma.com