
"Refugees Welcome"
 After a lot of debate I decided to title this image "Refugees Welcome". In the past 6 months the topic of refugees has been dominant in the news. With Canada as one of the countries that has openly welcomed refugees, I felt this image represented the statement appropriately. The concrete totems can be viewed as either emerging or going into the St. Lawrence river in Northern Quebec.A little back story on this image: we had picked a number of location to photograph this morning but the incessant rain messed up our plans. So we stopped for a second breakfast and more coffee. - Well one just cant keep sitting in a restaurant for ever so I decided to get this image rain or no rain. It was pouring but I had my GH5 with the 12 - 35 mm f/2.8 (version 1) lens attached. I wanted to slow the shutter down so as to prevent capturing the water drops splashing on the water but was not going to venture back to the car to get my ND filters. I had my polarizer on so I closed down the aperture to f/18 that was enough to give me a shutter speed of 60 seconds at ISO 100 - yes it was quite dark and miserable. I held my hand over the front of the lens to prevent rain from ruining the image. The camera and lens were soaked but I got the image. I am convinced, first hand - the Panasonic Lumix GH5 is great in the rain. One day I might consider doing a dust test - Africa or India would be great for that.The following images are ones I have already posted on Facebook but wanted to include them as a record of the trip to Northern Quebec and New Brunswick over the 4th of July weekend 2017.


GH5 with Leica 12-60mm at Shutterfest
 This was one of my very first images captured with the GH5 using the Leica 12 - 60 lens while the model was being prepped. The image is a jpg capture in sRGB. Click on the image to view it larger.
Lume Cube Review
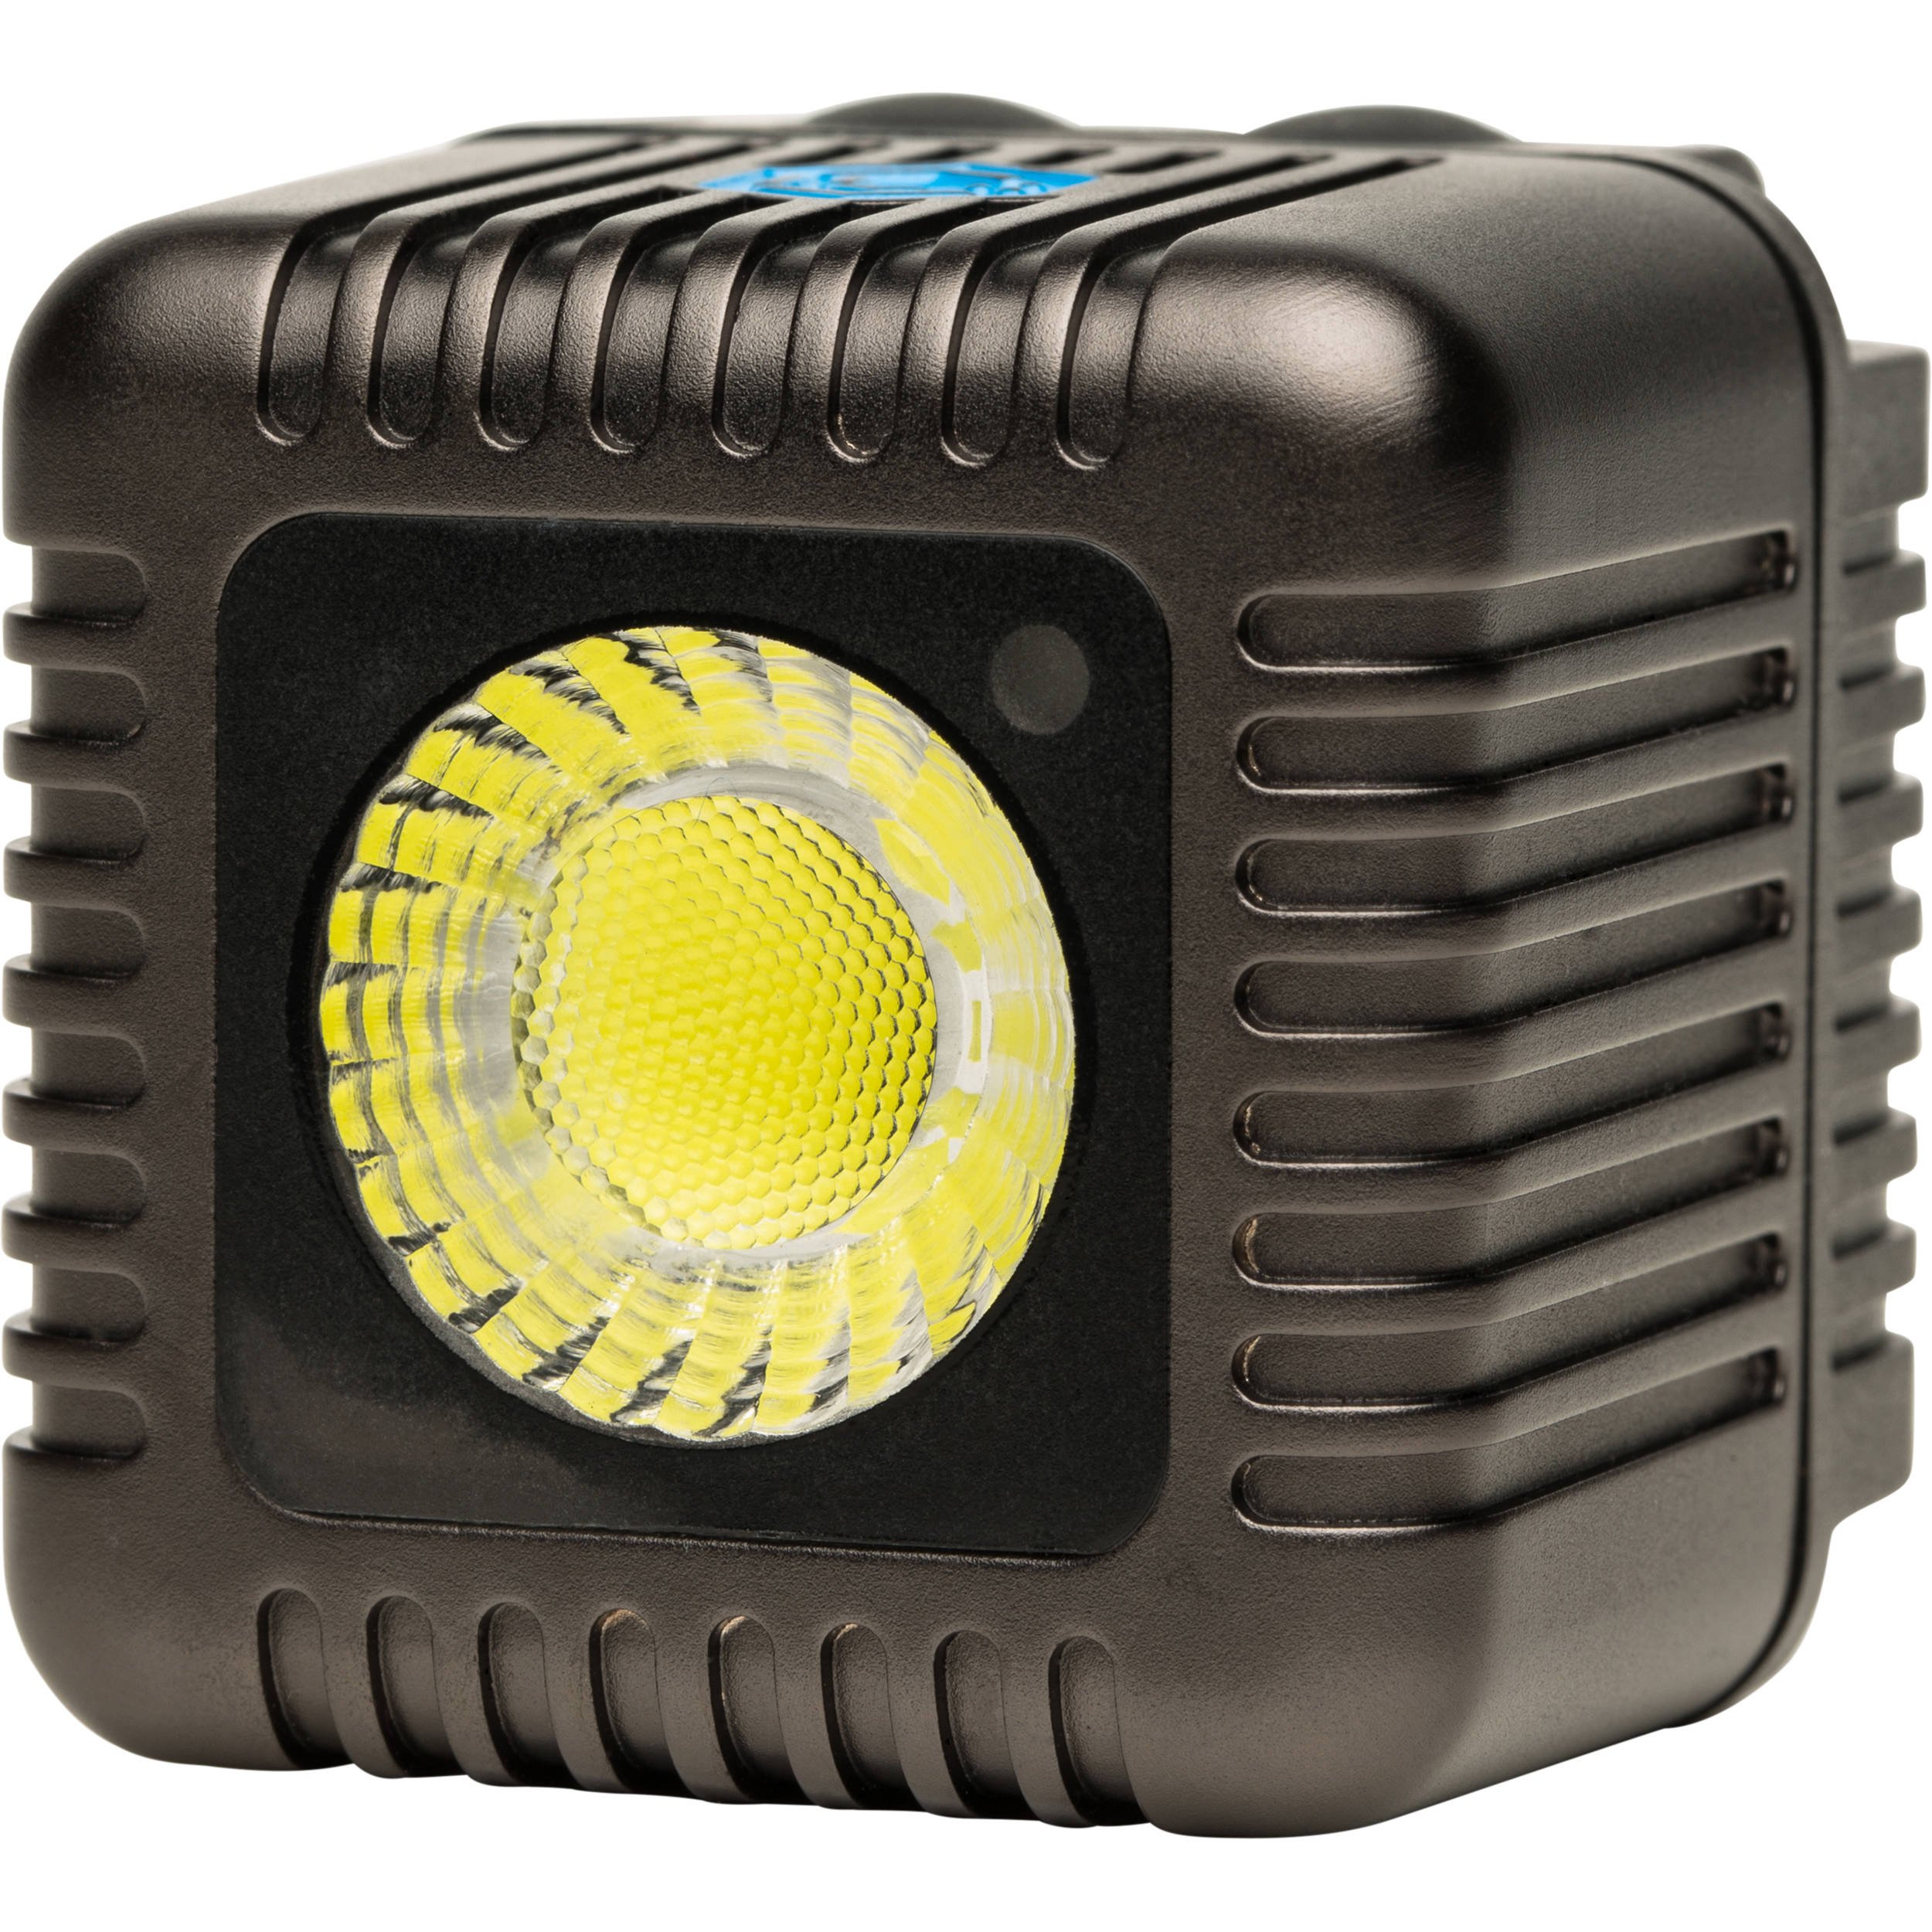 The makers of Lume Cube have a new smaller and less powerful but a highly efficient light designed for phone photography called the Life Lite. This is a smart, Bluetooth controlled, pocket-sized Lifestyle Light for iPhone, Android, DSLR or a GoPro. The Life Light will be available in March.This gadget review however, is of the original Lume Cube and the cheaper version that does not have any bluetooth connectivity. Both are identical in performance and while you can controll one with a smart phone the lite version is all manual. I have been using the Lume Cube for many months and have been most satisfied with its performance and portability. I have used these lights for macro, video and portraiture and love the results they have helped produce.Specs:
- Type LED
- Output Variable: 0 to 1500 Lumens
- Strobe: Variable 1/8000 to 1 second
- Mount Type: 1/4"-20 female
- Power Source: Integrated battery
- Battery Duration: 100% Brightness: 20 minutes; 90% Brightness: 60 minutes; 50% Brightness: 120 minutes
- Power Connector: USB (for charging)
- Waterproof Depth: 100' / 30.5 m
- Dimensions: 1.5 x 1.5 x 1.5"
CLICK HERE TO ORDERThe Lume Cube comes in a small cube shaped cardboard box that contains the Lume Cube and a USB charging cable.You do need to unscrew a small cover to access the charging port. This access cover is a requirement as the Lume Cube is rated to be waterproof to depth of 100 feet.Shaped as a cube, the unit has two rubberized push button switches on the top and a 1/4 20 mount that can be used to mount the light on a light stand, tripod or any flexible light mounting device.The two push buttons control the video light and the alternate flash function of the device. Each time you depress the on/off video switch the light cycles through 10 levels of intensity.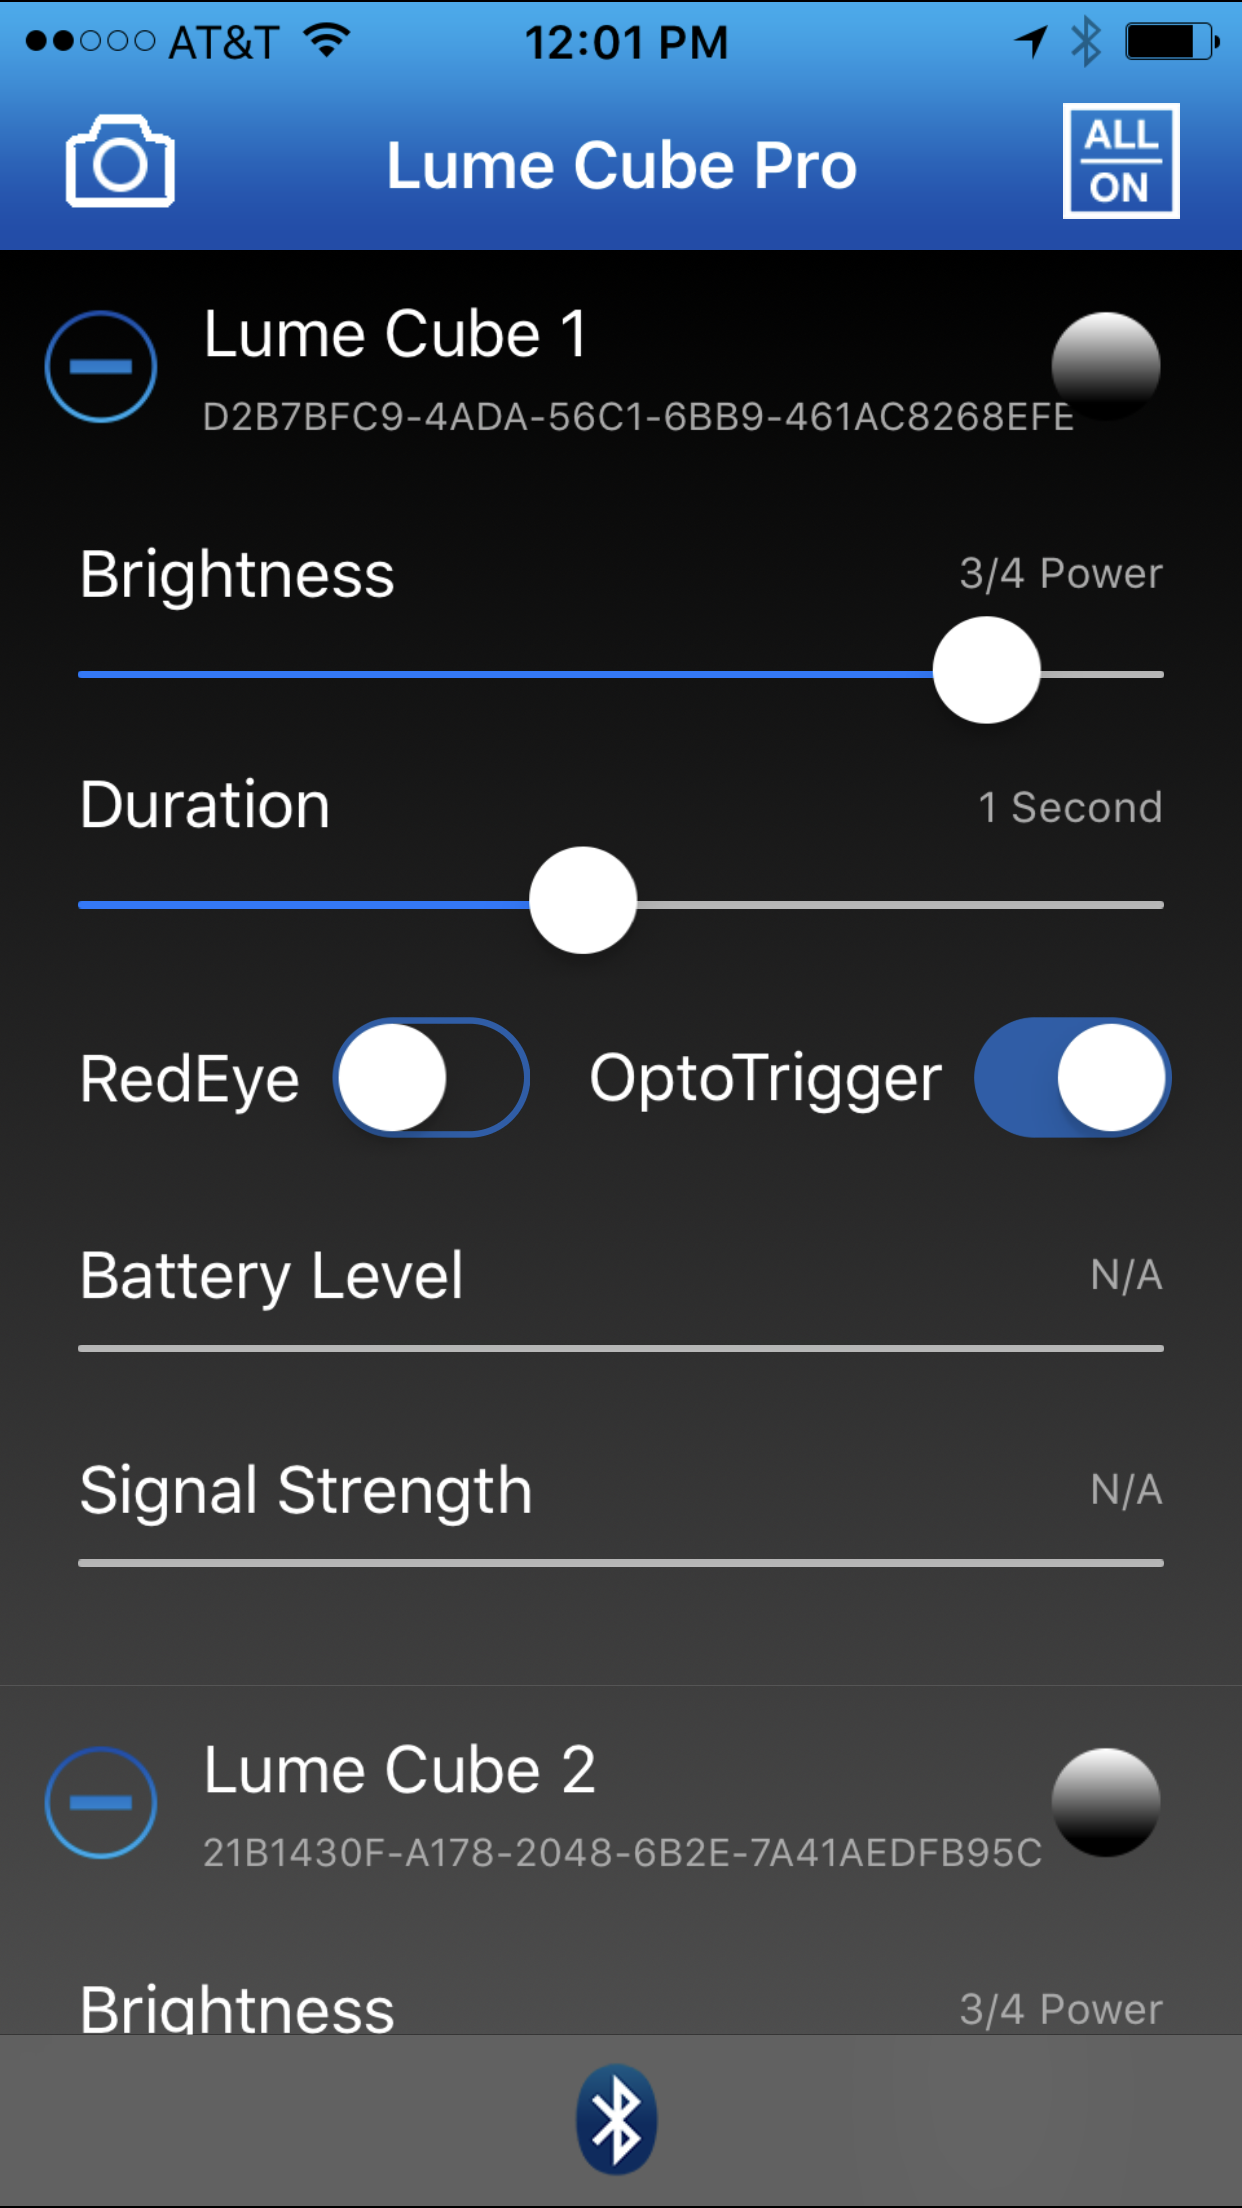 You can also control the Lume Cube using the mobile app. Lume Cube has simplified its lighting controls with a proprietary wireless, Bluetooth-enabled app, available on both Apple iOS and Android. The app is capable of controlling up to 5 Lume Cubes simultaneously. The app allows you to adjust the brightness, flash duration and red eye latency on each Lume Cube independently; and with its onboard optical sensor, Lume Cube can be configured as a slave flash unit to be fired by any other external flash.You have to register your Lume Cube to sync it to your app once registered you can control all your Lume Cube’s power and settings separately.Lume Cube Setup and test for portraitsTo test the Lume Cubes I fitted two Lume Cubes on two separate light stands. The “Main” Lume Cube was place so as to create Rembrandt lighting on the dummy head. The second was place to create a gentle fill. As you can see from the image below, the Lume Cube, due mainly to its size creates a fairly hard light. The settings were ISO 200, f/1.7 at 1/125 sec. using a Panasonic Lumix GX85 body and a Lumix 42.5mm f/1.7 lens wide open. The light emitted is cool and for this test I used an X-Rite Color Checker Passport to balance the temperature.
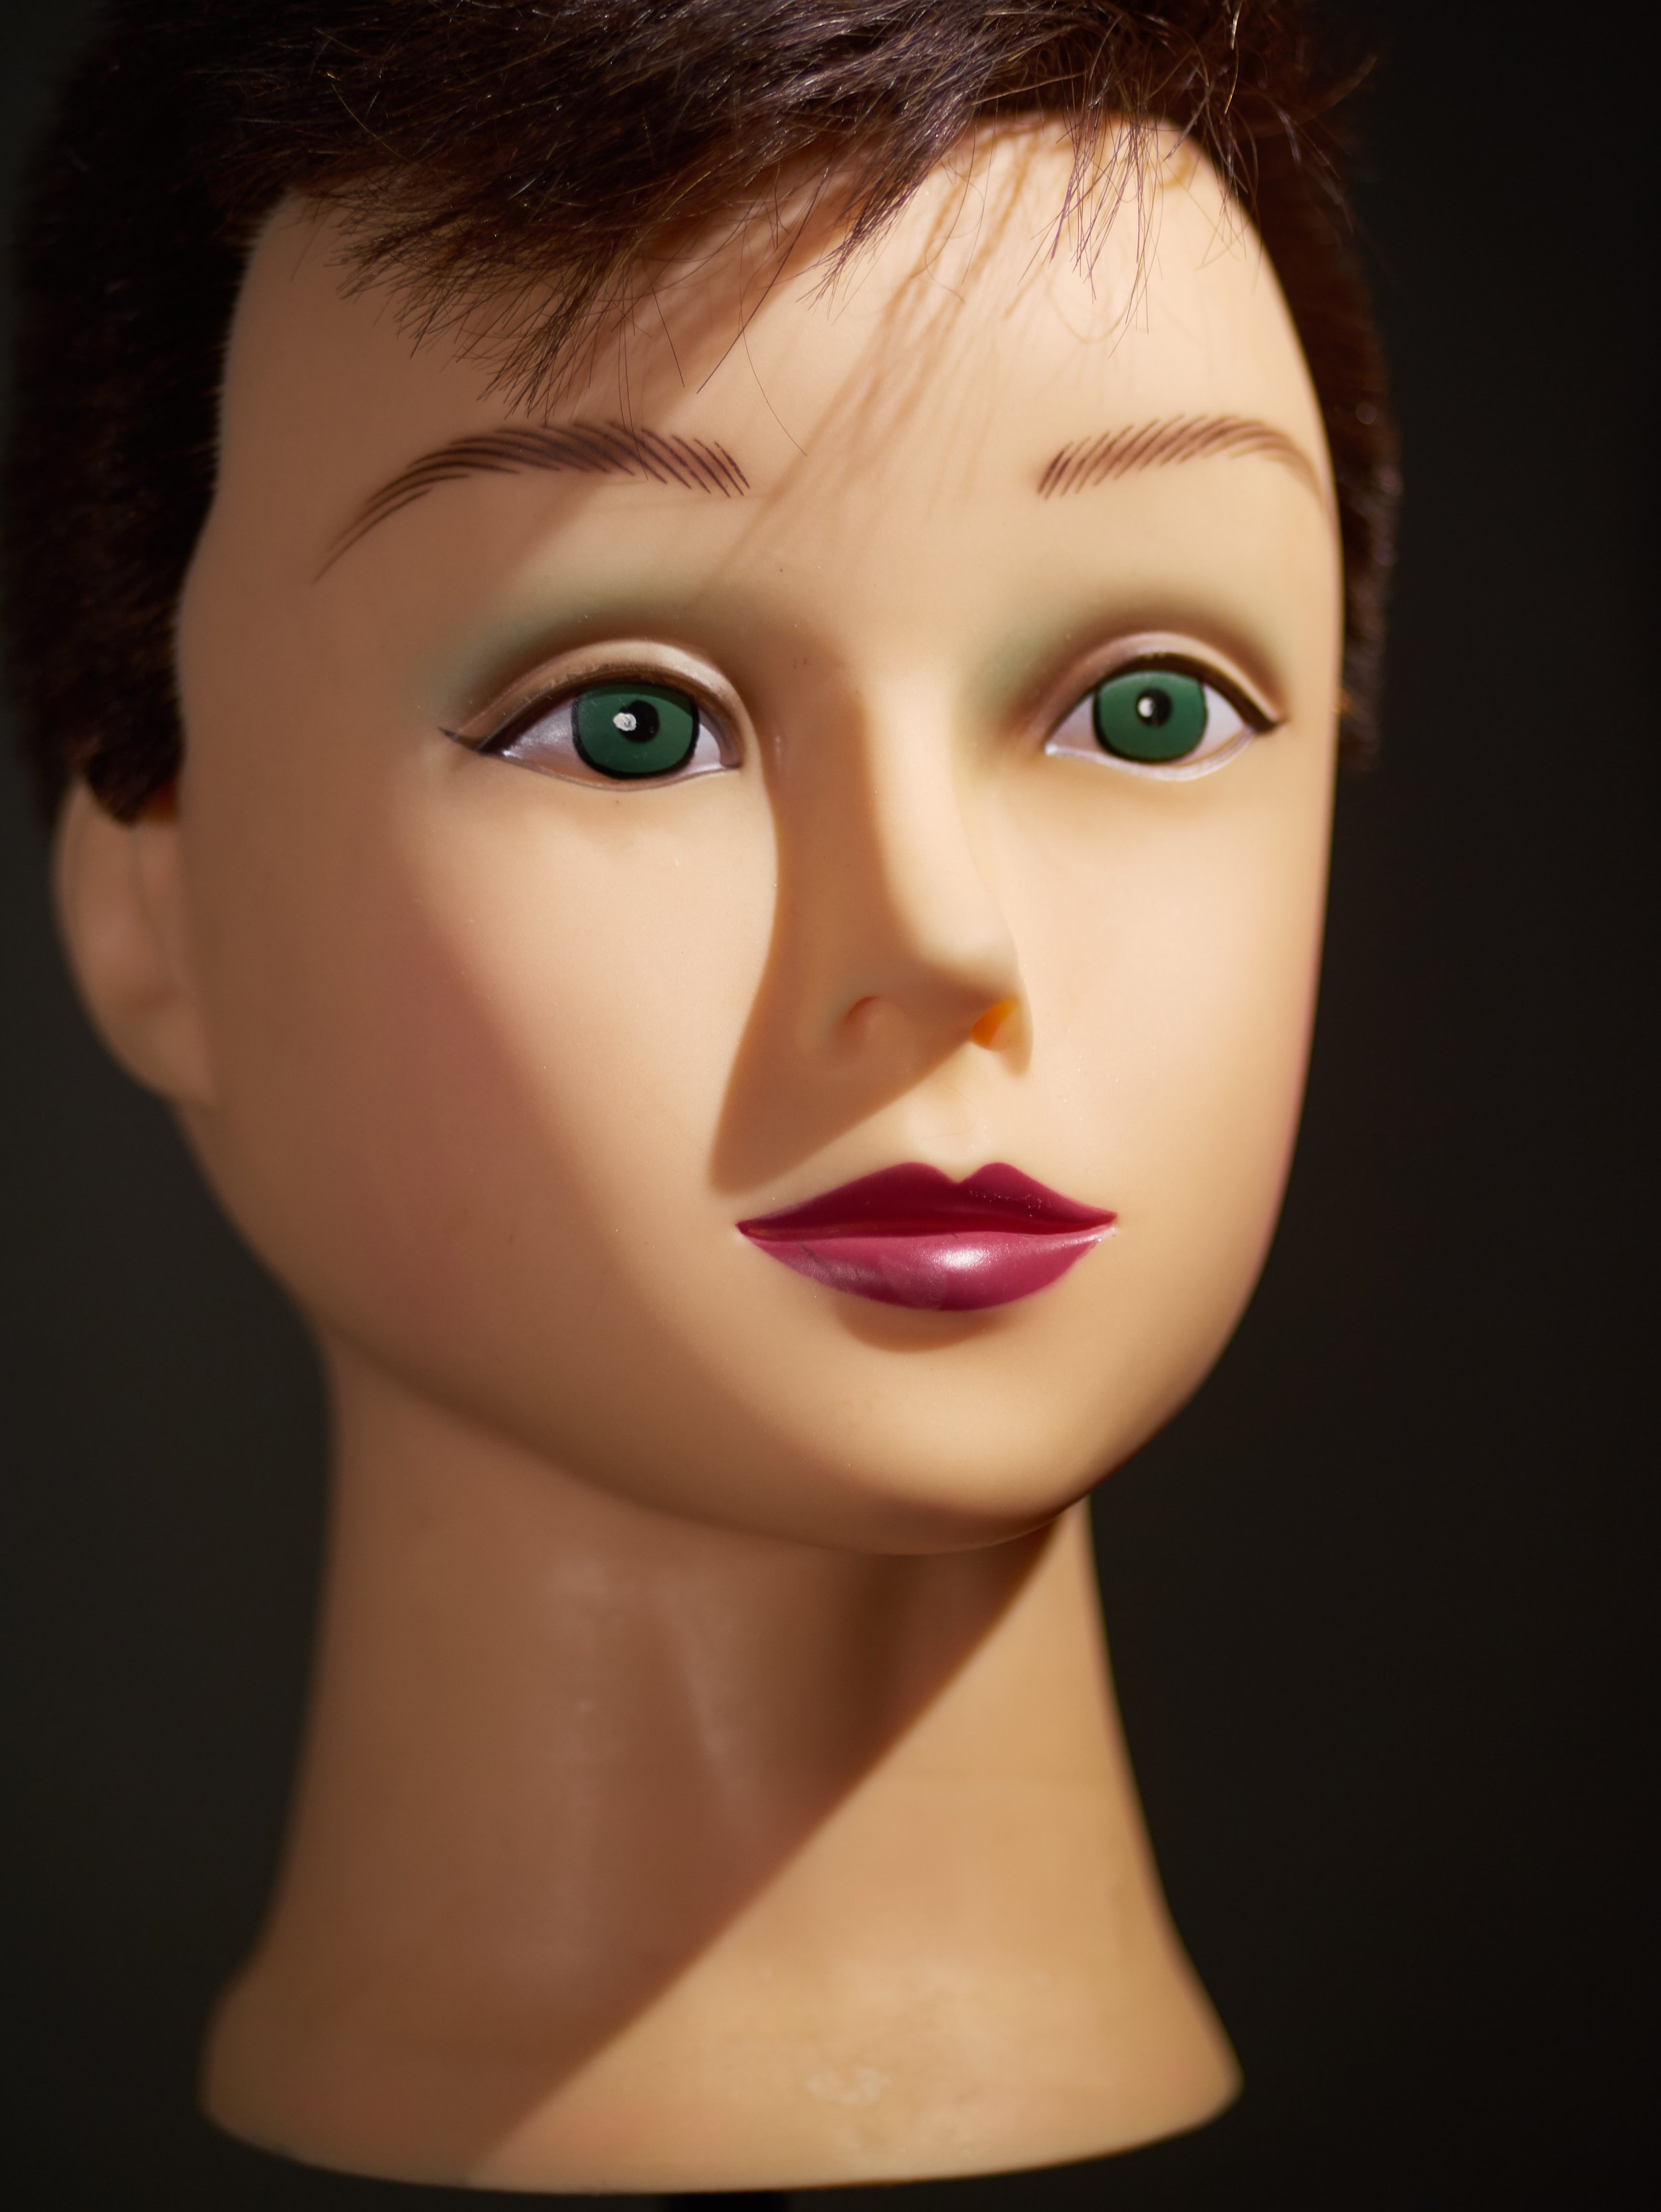 The second test was conducted with the same placement of the lights but instead of the Lume Cubes facing the dummy head directly the light was bounced off two Rogue Flash Benders. No Diffusion material was used.As you can see the light was much softer and way more pleasing in the image below. The settings were ISO 640, F/1.7 at 1/80 sec. Clearly there is about 3 stops of light loss when using the Flash Benders. However, the soft light is excellent for portraiture.
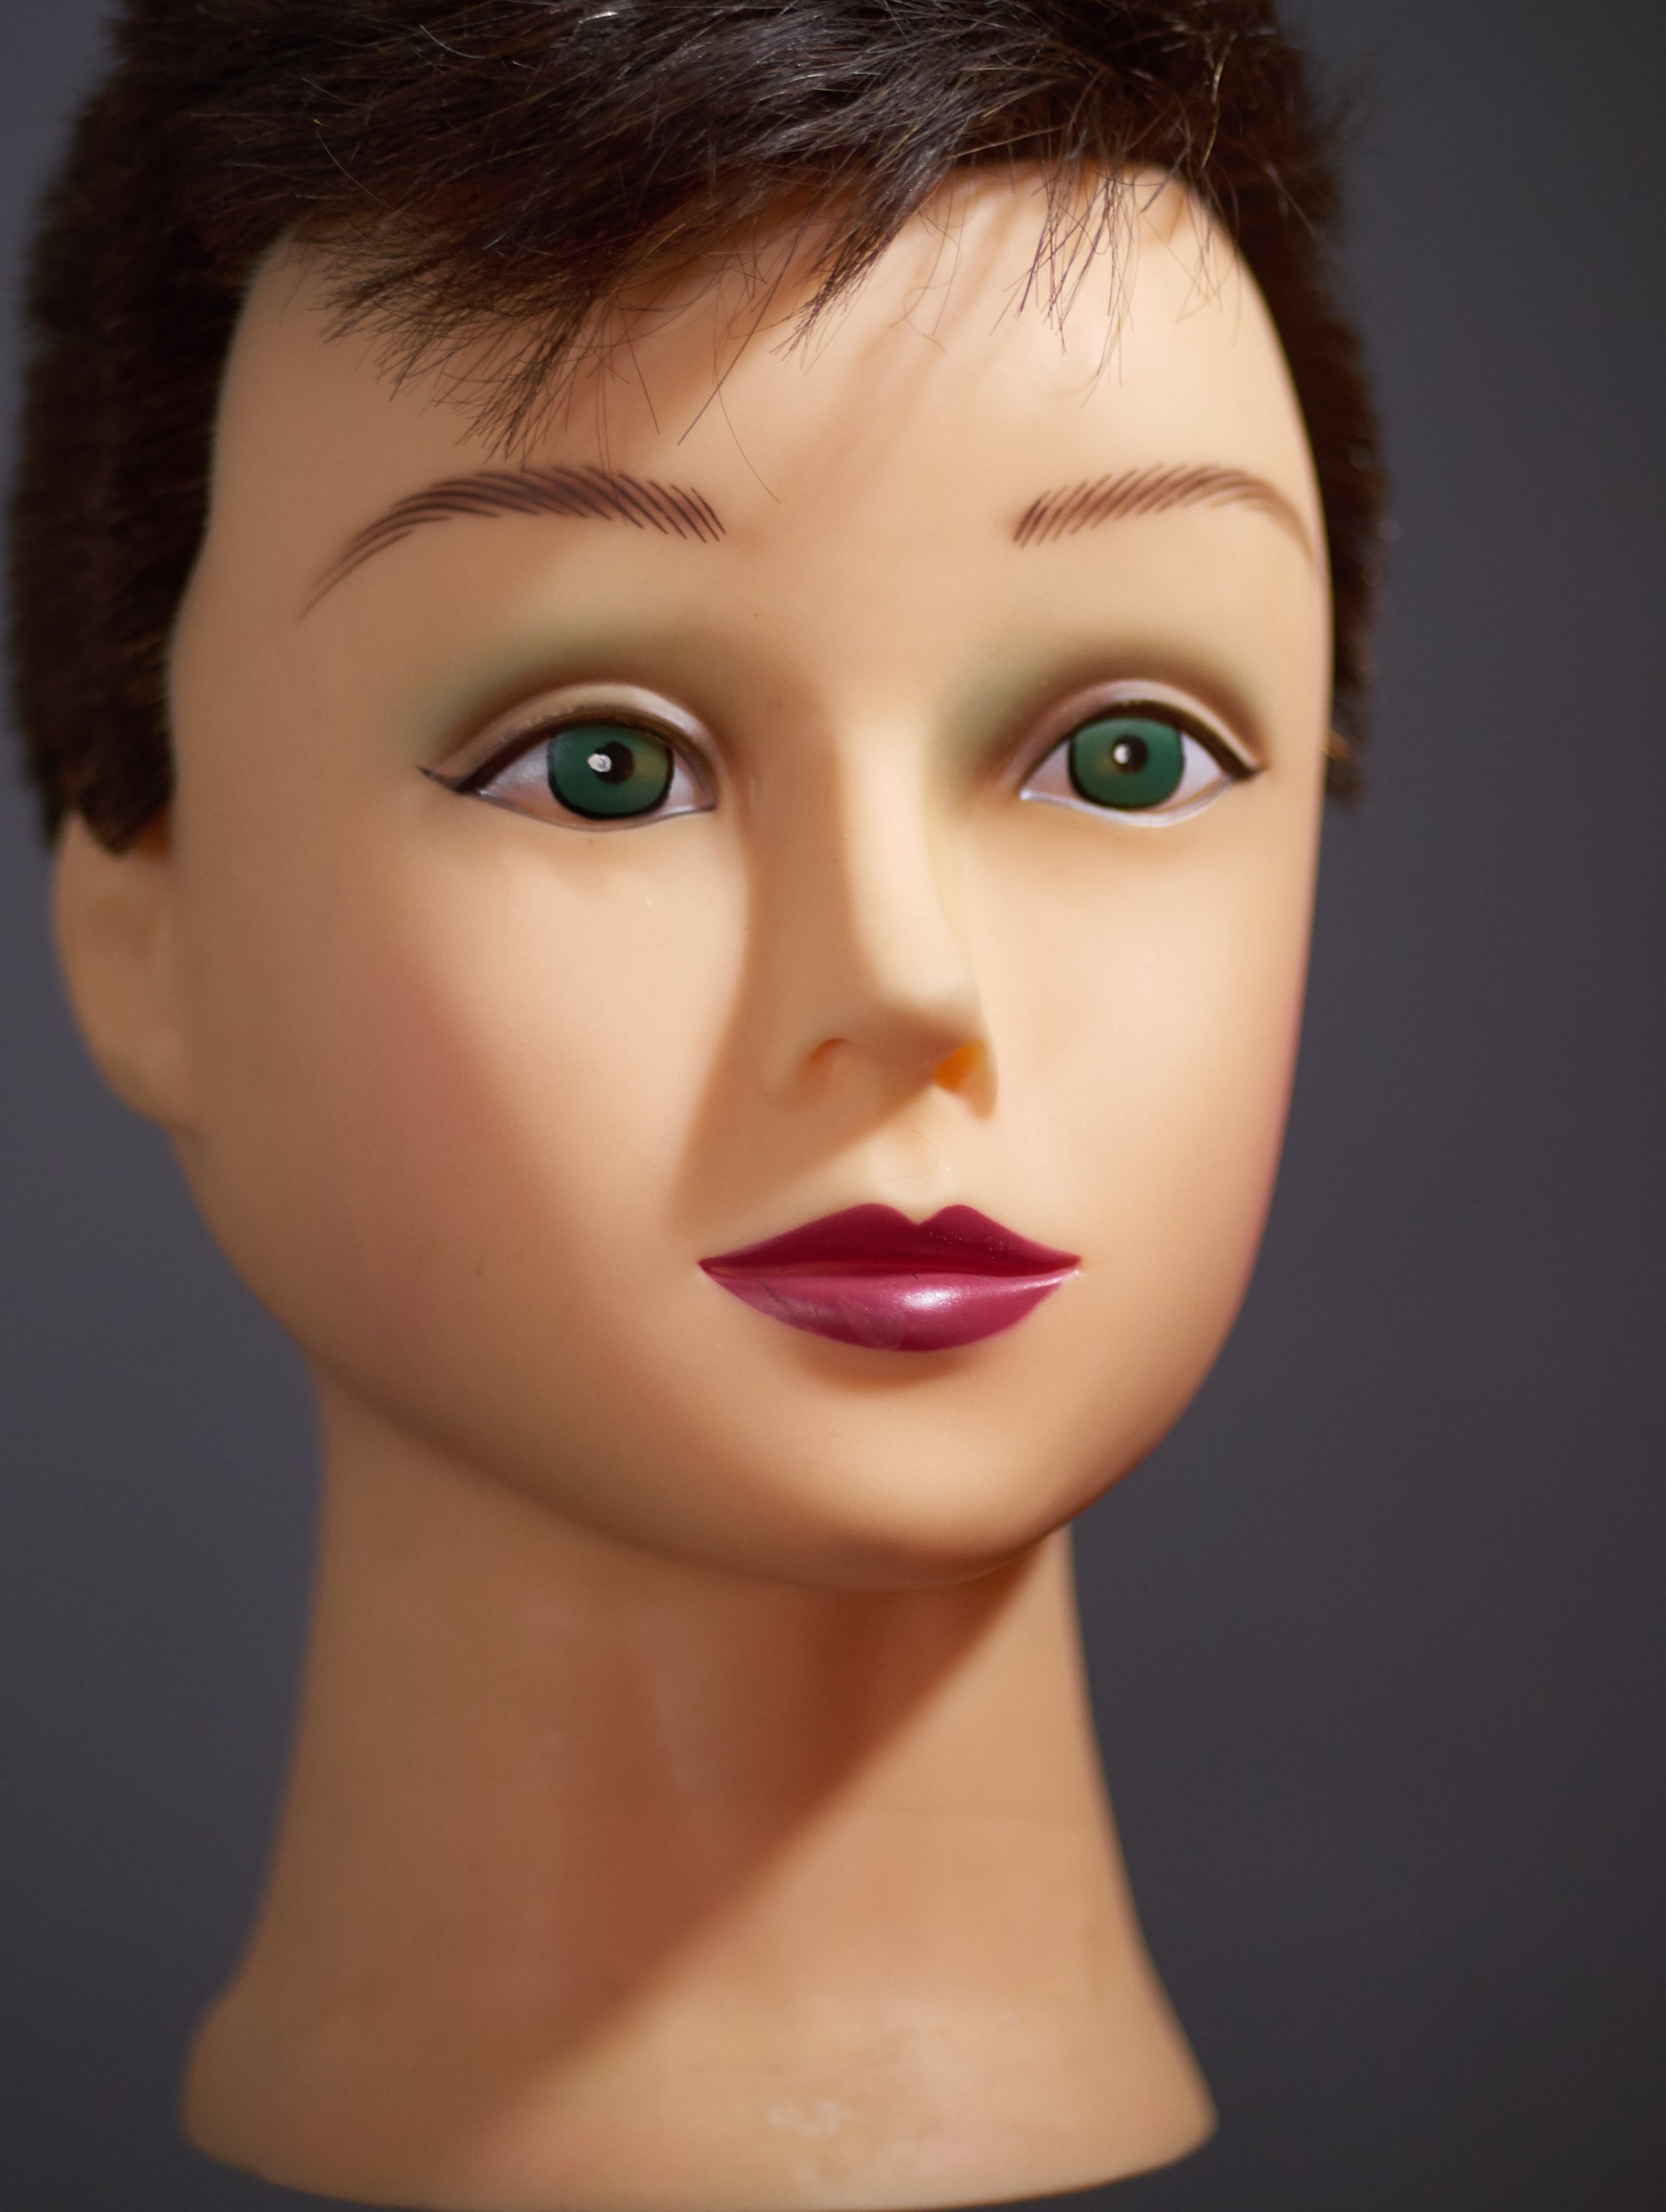 Lume Cube for Macro/Close-up PhotographyThe Lume Cube produces a really hard light as it is a very small light, but also a very powerful one. The Lume Cubes were about 1.5 inches from the subject. Exposure triad: F/4, 1/800 sec., ISO 640. The lens was a 30mm macro with an extension tube. Camera: Panasonic Lumix GX85.The following is the setup:
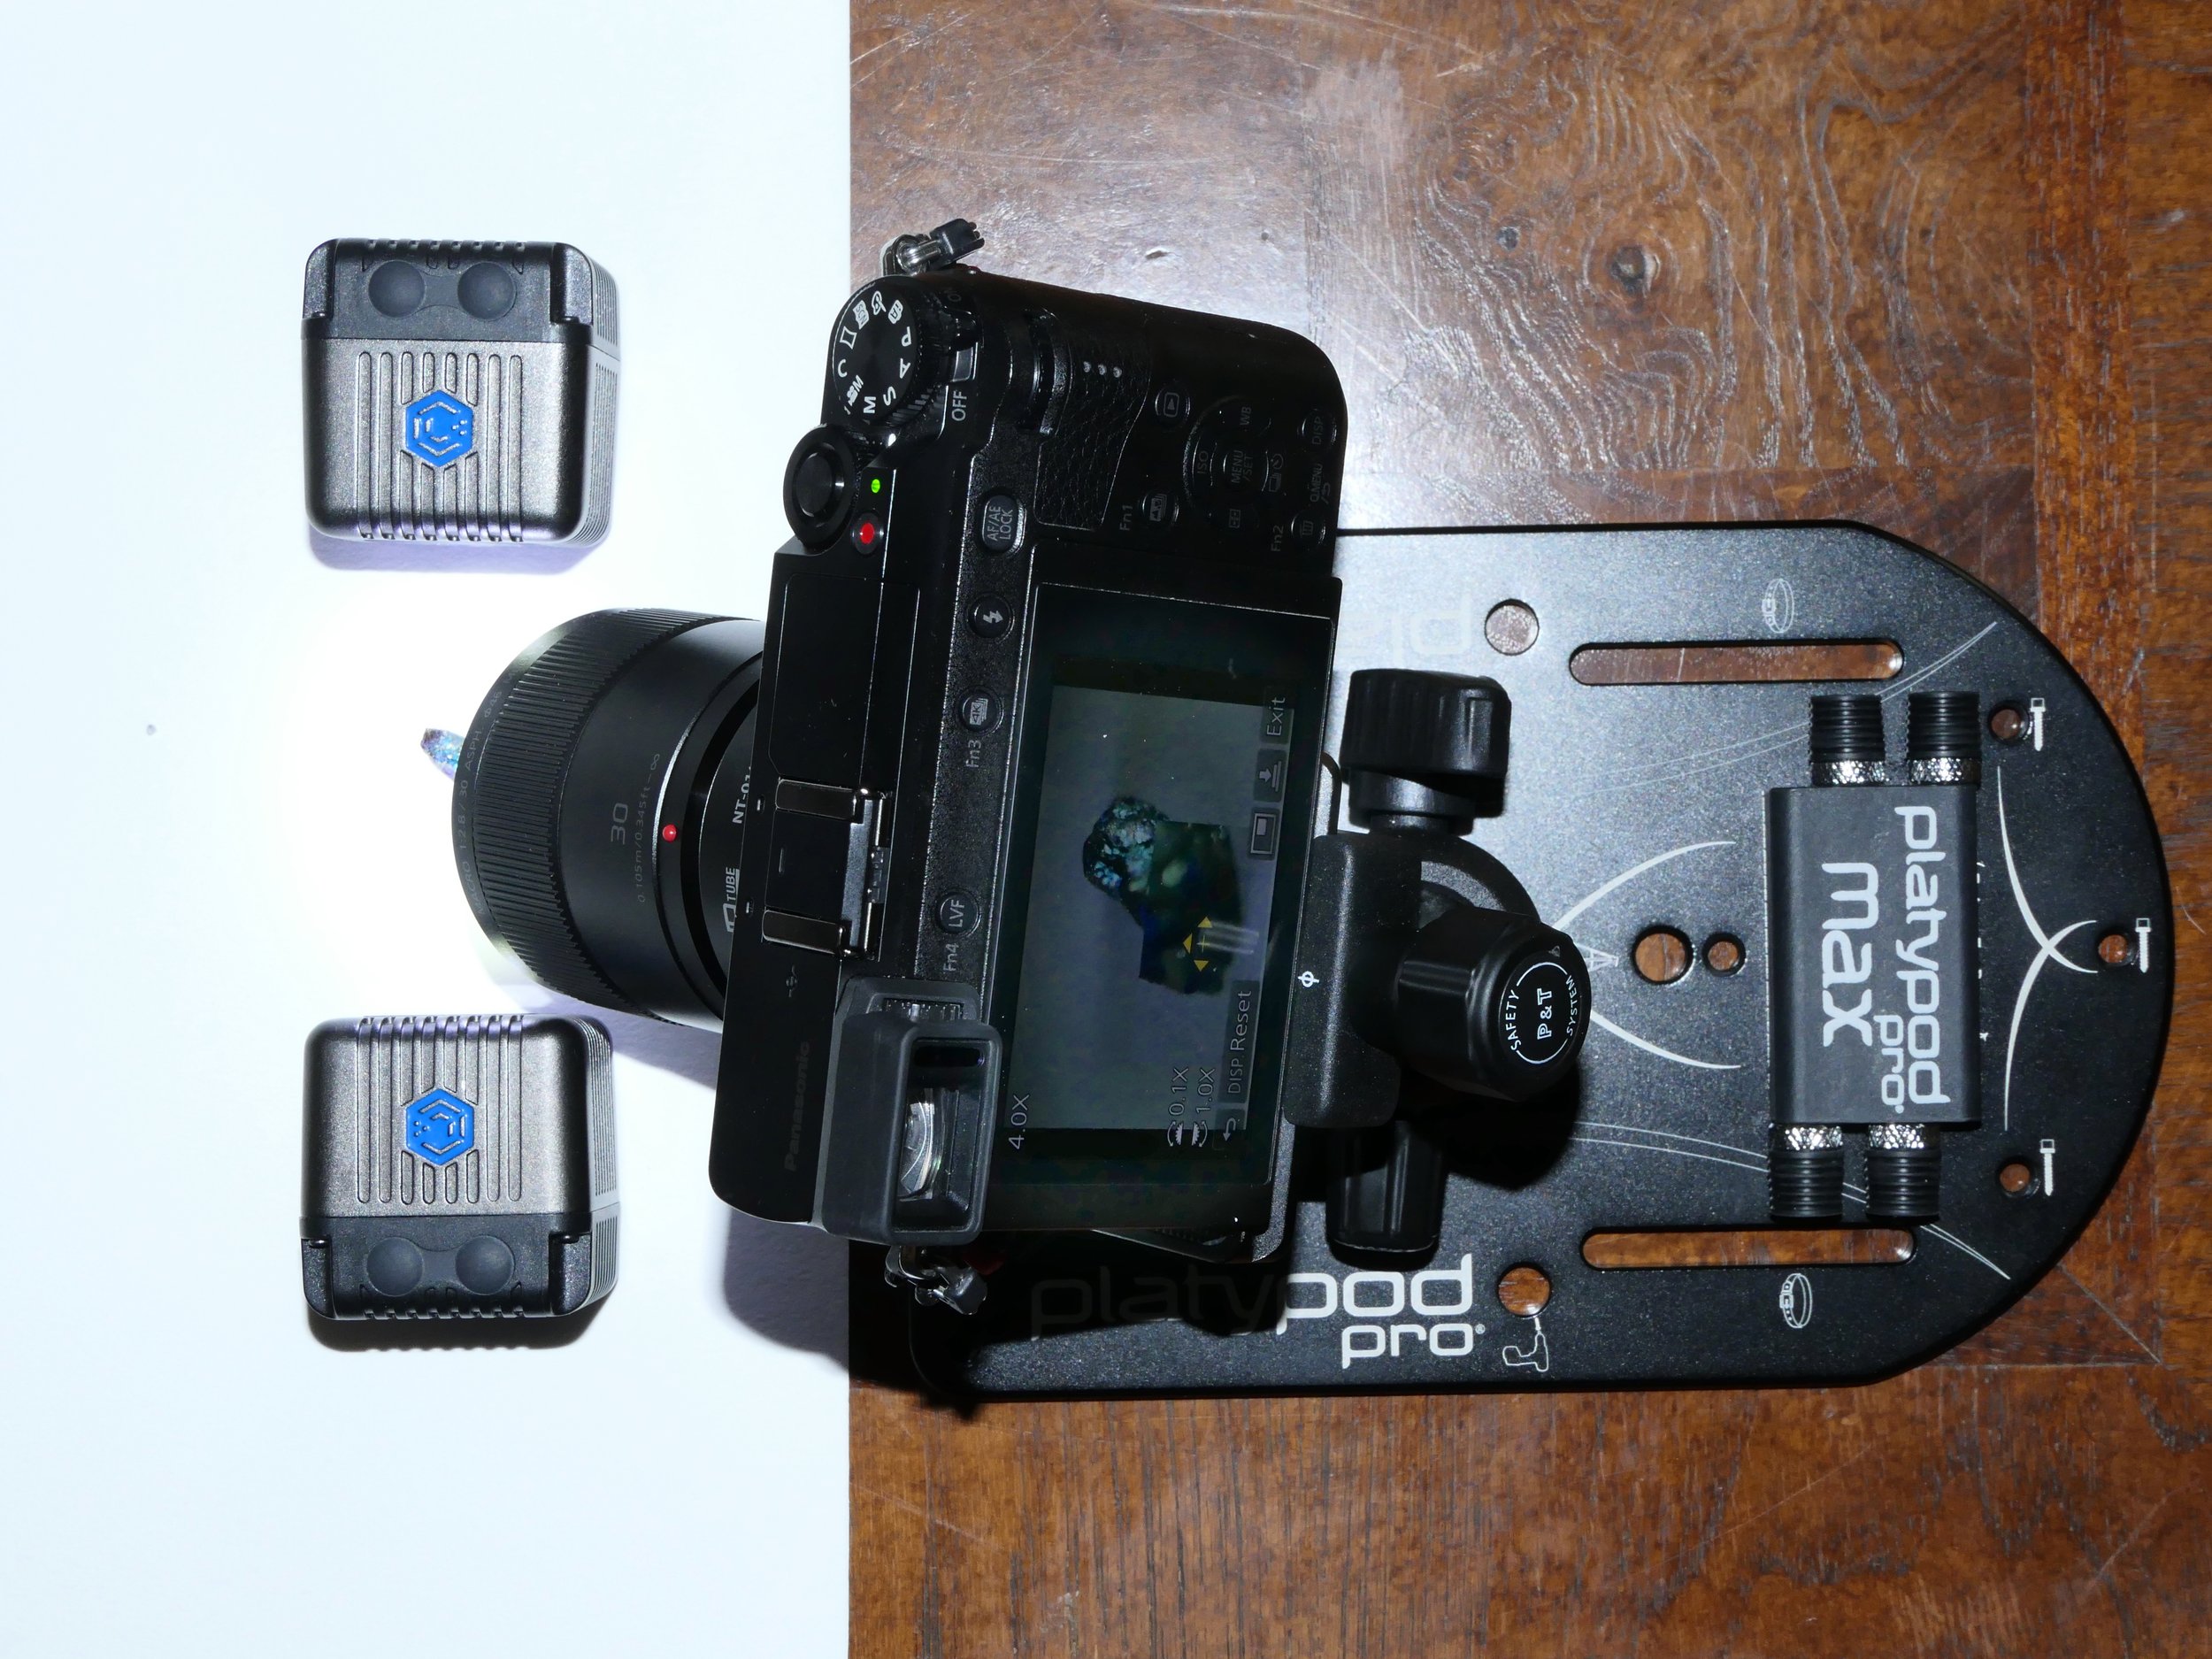 The image shown below is a 45 image stack using the GX85's focus bracketing feature.
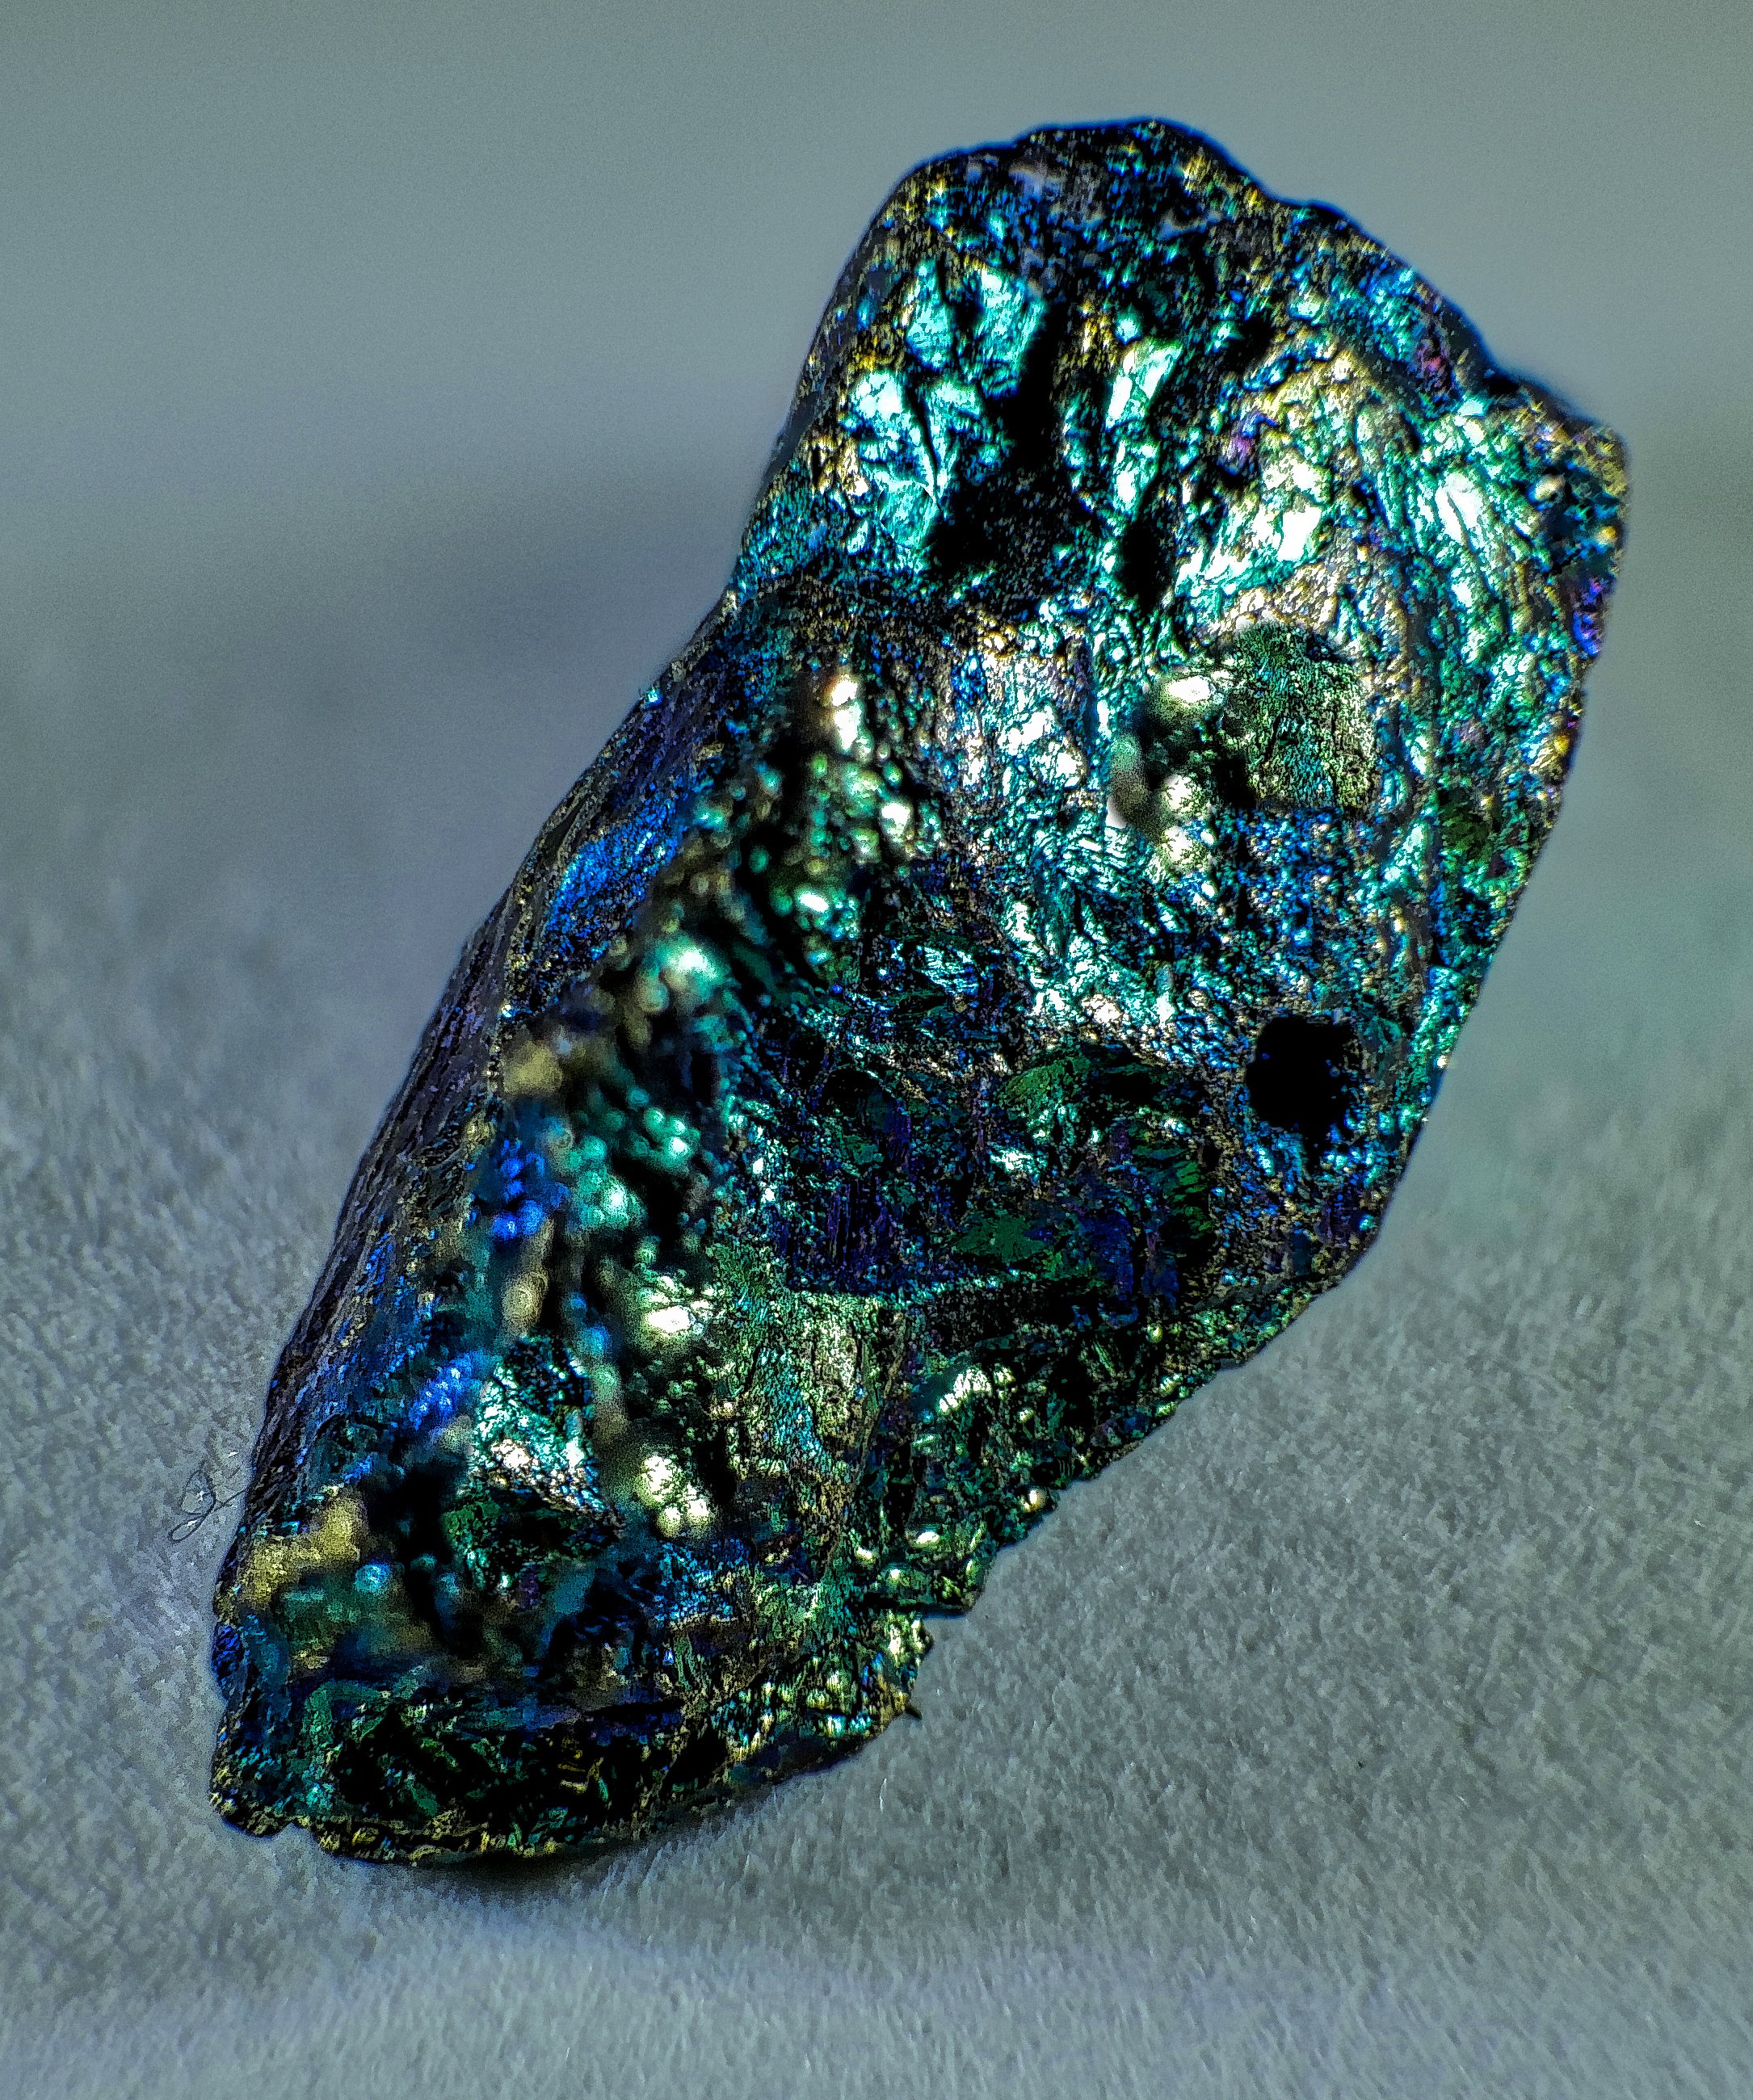 The portability of these little powerhouses has me convinced, and I tend to carry two in my bag at all times.CLICK HERE TO ORDER
The Joy of Mirrorless and IR
 Typical cameras are designed to capture the visible spectrum. Geting your camera converted to capture IR opens up another world of photography.Keep in mind that IR wavelength is longer than the wavelength range of the visible spectrum and thereby focuses differently. When you convert a DSLR you are limited to certain focus adjustments that must be made so as to achieve the best quality of images with sharp focus. As lenses with different focal lengths behave differently you need to select one lens and have the camera sensor calibrated to achieve sharp focus with that lens. Any other lenses will not be in a position to achieve good focus. Live view can help but it is not the best option.Mirrorless cameras on the other hand rely on the imaging sensor for focus attainment and metering they are able to discern the IR focus shift in real time and adjust accordingly. This feature allows you to use any lens, prime or zoom and capture sharp IR images.In my opinion a mirrorless cameras with no in body image stabilization is a better choice for conversion.Lifepixel is who I use and their service and conversions are exceptional. Click on the icon to get started.
![]() Use the coupon code shivverma50 to get $50 Off with a Priority Processing Upgrade - this coupon code expires on August 6, 2016
Use the coupon code shivverma50 to get $50 Off with a Priority Processing Upgrade - this coupon code expires on August 6, 2016
You don't need big bucks
Recently, I watched a high-end photo shoot demonstration where multiple Broncolor studio lights and power-packs were used to photograph a bottle of single malt Scotch Whisky. At least four Broncolor Strobes with Broncolor Strip boxes and focusing light modifiers were used to capture the image. It was an excellent demonstration and the results were great. Well here is my version: Westcott was kind enough to provide me with a set of Rapid Box Strip lights that I decided would have to do the job.Each Rapid Box Strip was mounted on a light stand and a Nissin DI866 flash head triggered by a Yongnuo wireless trigger was used as the light source. A third Nissin i40 flash also triggered by a Yongnuo trigger was used as the light for the label on the bottle. A Rogue Flashbender was formed into a snoot to concentrate the light and prevent any spill.The camera was a Panasonic Lumix GX8 with the Lumix 35 - 100mm f/2.8 lens. A Yongnuo mounted on the hot-shoe was used to trigger the lights. Exposure triad: f/7.1, 1/100 sec, ISO 200. Lens focused at 42mm.Here is a behind the scenes image.
One Day Workshop Schedule
ALL ONE DAY WORKSHOPS ARE TEMPORARILY SUSPENDED
Workshop details are available from the Registration Page.
Macro and Close-up Photography
Flash Photography, High Speed flash, creative lighting
Portrait and Lighting Techniques
Digital Photography A-Z. This is a one day three part course that will teach you camera basics, post processing and printing.
The Digital Darkroom - a course that covers image capture, asset management, processing and enhancement, output to print and web media. A one day program for digital image making workflow
Timelapse Photography, post processing and video assembly
If you have any questions or would like more information please call 617-759-0010 or email sv@shivverma.com
Please use this REGISTRATION link to register for these workshops.
ND Filters' Color Cast comparison - Vü 10 stop Sion, Lee 10 stop (Big Stopper) & Formatt Hitech 8 stop
The Lee Big Stopper was introduced in 2010 to compete with the Hitech 10 stop filter that was known to have flare and other issues. Subsequently Hitech reengineered their 10 stop filter and emulated some of Lee’s design features. In particular the the light blocking gasket. Soon Lee introduced the Little Stopper while Hitech developed a wider range of solid ND filters the Pro Stop line from 6 to 10 stops and in multiple sizes. Most recently I was introduced to the Vü system and hence this test as a comparison. I will do a full review of the Vü system in the near future.As I own the Lee Big sStopper and the Hitech 8 stop with the Hitech holder (I do prefer the Hitech to the Lee holder) I was keen to understand the differences in the way high f-stop ND filters impart a color cast when used. Hence this test. Please click on the images to see a larger version.The set up was fairly simple. Using a Sony A7R II and a Zeiss Batis 85mm f/1.8 lens set at f/2.0 and a base ISO of 50, shutter speed 1/125 sec. The light source was two Elinchrome studio strobes positioned to give a 1/3 stop exposure variation at the edges. The camera was focused on a white foam-core board with a X-Rite Color Checker Passport clamped to the upper right corner. Camera white balance set for flash rather than a custom white balance (5450 Kelvin) and an "as shot" tint of +9. I wanted to allow for any variation in the white of the foam-core board that is typically not 100% white be adjusted in post.The test exposure was made and the white balance adjusted in post using Lightroom - this is the image below. White balance adjustment yielded a temperature of 4750 Kelvin and a tint of -1: Next the strobes were adjusted to full power providing 8 additional stops of light. The ISO was adjusted to increase sensitivity by two stops while the aperture of the lens was kept at a constant f/2.0 for all the exposures. Each filter was tested for color cast only.
The Lee Big Stopper (10 stop ND)
The Lee Big Stopper (10 stop ND) was mounted and the image as shown below was captured. This is as a screen shot so as to show the RGB histogram. The info panel shows the reading from the center of the captured image. Values are R=219, G=229, B=243 In this next image the Info Panel shows RGB values from the lower third of the image. Values are R=187, G=203, B=222
 Next the image was white balanced in Lightroom WB to 8600 Kelvin and tint +43. Compensated for the color of the board and the lights the calculated readings are 7900 Kelvin and a +35 Tint adjustment.
 The Lee Big Stopper exhibits a heavy blue cast in both the center and the edges.
Formatt Hitech 8 stop ND filter
As I do not have a 10 stop Formatt Hitech filter, I chose to do the same test with the 8 stop that I own. As with the Lee filter before, here the info panel shows the reading from the center of the captured image. Values are R=234, G=238, B=236 In this next image the Info Panel shows RGB values from the lower third of the image. Values are R=209, G=220, B=212
 Next the image was white balanced in Lightroom WB to 5750 Kelvin and tint +52. Compensated for the color of the board and the lights the calculated readings are 5050 Kelvin and a +44 Tint adjustment.
 The Formatt HiTech 8 stop exhibits a heavy green cast at the edges but is more neutral in the center.
Vü Sion Q 10 stop Neutral Density Filter
The Vü Sion 10 stop ND filter mounted using The Vü professional filter holder (more abut this in a future post) and the same test was performed. As before the image captured is shown as a screen shot showing the RGB histogram. The info panel shows the reading from the center of the captured image. Values are R=235, G=235, B=239 In this next image the Info Panel shows RGB values from the lower third of the image. Values are R=211, G=214, B=219
 Next the image was white balanced in Lightroom WB to 5800 Kelvin and tint +13. Compensated for the color of the board and the lights the calculated readings are 5000 Kelvin and a +5 Tint adjustment.
 The Vü Sion 10 stop is very neutral in the center an has a negligible shift at the edges.In conclusion I am very impressed with the Vü Sion 10 stop and is near neutral rendering. My full review of this system is forthcoming.
Review of the Hähnel Captur Module Pro, Captur Module - IR and the Captur Receiver
Hähnel Captur Module Pro remote trigger with sound, light, laser and IR triggering. Hähnel of Ireland has replaced the wonderful Giga T pro with Captur Module Pro. Capture is high-speed trigger system that will provide remote triggering, intervalometer functions, delay triggering, long exposure and will will also work as an ordinary flash trigger.Some of the more interesting features are sound, light, laser and infrared sensors for high-speed or wildlife photography. What is even better is that the system has an auxiliary port. This allows you to use any third part triggering devices to be connected to the Captur Module Pro that in turn will trigger your camera.The basic kit comes as a set of two devices. A hand held control unit and a IR transmitter. You will need an optional wireless unit to control your camera wirelessly. The controller is a 2.4GHz transmitter with a range of 320 feet. It will work with either shoe-mount flashes or studio lights as there is a hot-shoe and a sync port. There are models for Nikon, Canon, Sony and Olympus/Panasonic. Best of all the modules all use AA batteries.Features:
- Captures Time Lapse Photography, High Speed Photography, Motion & Wildlife Photography
- Four built-in sensors (light, sound, Laser & IR). The package indicates five built-in sensors however there are four sensors (three windows) and an auxiliary port that can accommodate an infinite variety of sensors and triggers.
- Auxiliary port allows to connect 3rd party sensors such as pressure plates, humidity & temperature sensors
- Fully programmable timed sequences including delay, interval timer, exposure count & exposure length setting
- Shutter release button with autofocus, single & continuous shooting & bulb mode
- Connect wirelessly to camera using the Captur Receiver (sold separately)
Construction:The Captur Module Pro and the IR Transmitter are encased in rubber shield that covers the unit with the exception of the display and control face. Each has a 1/4 20 thread that lets you mount the units on a tripod, light stand or clamp. The IR Transmitter mounts inverted to protect it from the elements. The Capture Receiver is not rubber encased. Module Pro: The face of the unit has the display window, three buttons - Lock, Trigger and Start/Stop. Blow these is the four way rocker and a center “set” button. The left side has the cameras cable release port and the auxiliary port. The top has the microphone, IR sensor and Light sensor. The right side has a micro USB port that can be used to power the device, and the on/off switch. Note the micro USB port is covered by the rubber enclosure. The underside of the unit has the 1/4 20 mount and the battery compartment also accessible by removing the upper enclosure.
 The Module IR has a high/low switch on the front face and the 1/4 20 mount. The IR bean is emitter from the top of the unit.he On/Off switch is located on the left side and the batter compartment is in the bottom also covered by the rubber enclosure.
 The Capture Receiver has a flash hot shoe on the face a test button and an indicator light that flashes green when the unit is ready and turns red when the unit is activated. The left side has the remote trigger cabe port while the right has the On/Off switch. The bottom of the unit has a combination hotshot mount and a 1/4 20 mount. Also on the bottom is the battery compartment. Note: this unit does not have a rubber enclosure.Using the units:The handheld remote controller can be connected to your camera with a remote cable or wireless is used with the wireless receiver unit. The controller will allow you to configure various shooting scenarios that require precise delays and also works as an intervalometer for time-lapse photography. Unlike the Giga T Pro, Captur Module Pro will work as a conventional flash trigger in addition to the remote triggering functionality when paired with a Captur unit.The control unit has settings for Hours, Minutes and Seconds (HH:MM:SS) and a mode delay of 00:01 through 10:00 seconds (duration in 1/100th second). A 4 way rocker for modes and a central push button for setting the parameters. Buttons for triggering, start/stop and lock. There are four configurable options:
- Delay - lets you set an interval between the time the trigger is fired and the shutter is activated.
- Long - allows you to set a long exposure duration - the camera must be set to bulb mode. It is also possible to do long exposures without programming. This is achieved by depressing the release button for 3 seconds and the bulb function will lock and you can release the button. Depress the button once more to end the bulb exposure (long exposure).
- Interval 1 - is configured to set the interval between shots and then N1 sets the number of shots to take.
- Interval 2 configures the time between interval (Interval 1) activation sand N2 configures the number of times the Interval 1 and N1 sequence is repeated.
Using the Captur Module pro is easy if you are familiar with the Gia T Pro system. There is an online manual that is reasonable week detailed for those who have not used a Giga system or are new to Remote triggers and intervalometers.Configuring for various modes:All modes have some common options: sensitivity, amount of delay before the unit will trigger the shutter, the duration of shutter open when the camera is in bulb mode and the number of allowed activations. To enable a mode all you need to do is to press the Start/Stop button to start the process. A ready LED turns green and when the mode is triggered the LED turns Red as a verification.To set the mode, use the rocker switch to get to the sensor mode you want. The modes are in the following order:Sound mode- adjust the sensitivity of the sensor as needed.Infrared (IR) mode, (you need to use the Module - IR). Set the Module - IR and the Module - Pro so they are aligned with the IR beam lens in line-of-sight with the receiver window of the Module Pro. When the IR beam is interrupted the unit will be triggered. The Module IR has High/Low setting. Use the low setting for a beam length of 4.5 feet or less and the High for lengths greater than 4.5 feet.Light Mode - here the sensor is activated when there is a change in light level - bright to dark, dark to bright. Ideal for fireworks, lightning, or indoors with any light being turned on or off.Laser - this mode requires a laser beam to be pointed at the receiver window and works the same way as the IR beam but with a much greater distance between transmitter and receiver.AUX - this mode requires you to connect any triggering device to the Captur Module Pro via a 1/8” Tip-shield plug.Pricing:The Captur Pro Module is $120, Two receiver modules are $45 each; A pair of flash triggers not reviewed are $100 and the Capture Timer Module also not reviewed is $60.Conclusion:In my opinion the Captur system is probably the most versatile triggering system I have used and as it uses AA batteries it will last through extremely long time-lapse sequences without having to worry about a premature shutdown. The construction is solid as is the performance. In all of the tests performed the unit did not miss-fire.
Rendezvous with the Sensuous
 "Every direction offers a lesson in form and aesthetic options; one element after another attracts the eye with texture, color and tension that provokes a spectrum of emotion."an excerpt from Rendezvous with the Sensuous: Readings on Aesthetics - Linda Ardito, John Murungi
Testing Affinity from Serif
Have not had a lot time to test the 2nd Beta release of Affinity but gave it a good shot yesterday. Still a lot to learn, but on the whole, I like it a lot. Has some great features built in, the filters are great but not sure I like the fact that it creates an intermediate file. The following is an image processed entirely using Affinity (Sony Raw to a TIFF export).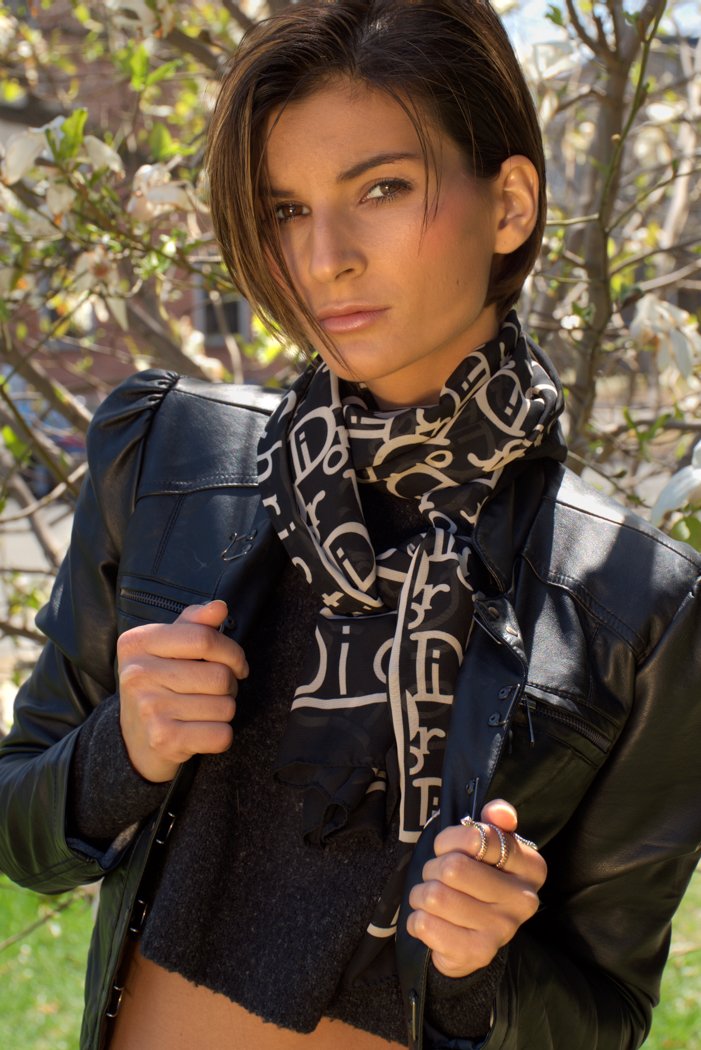
70 South Gallery - Lighting Workshop
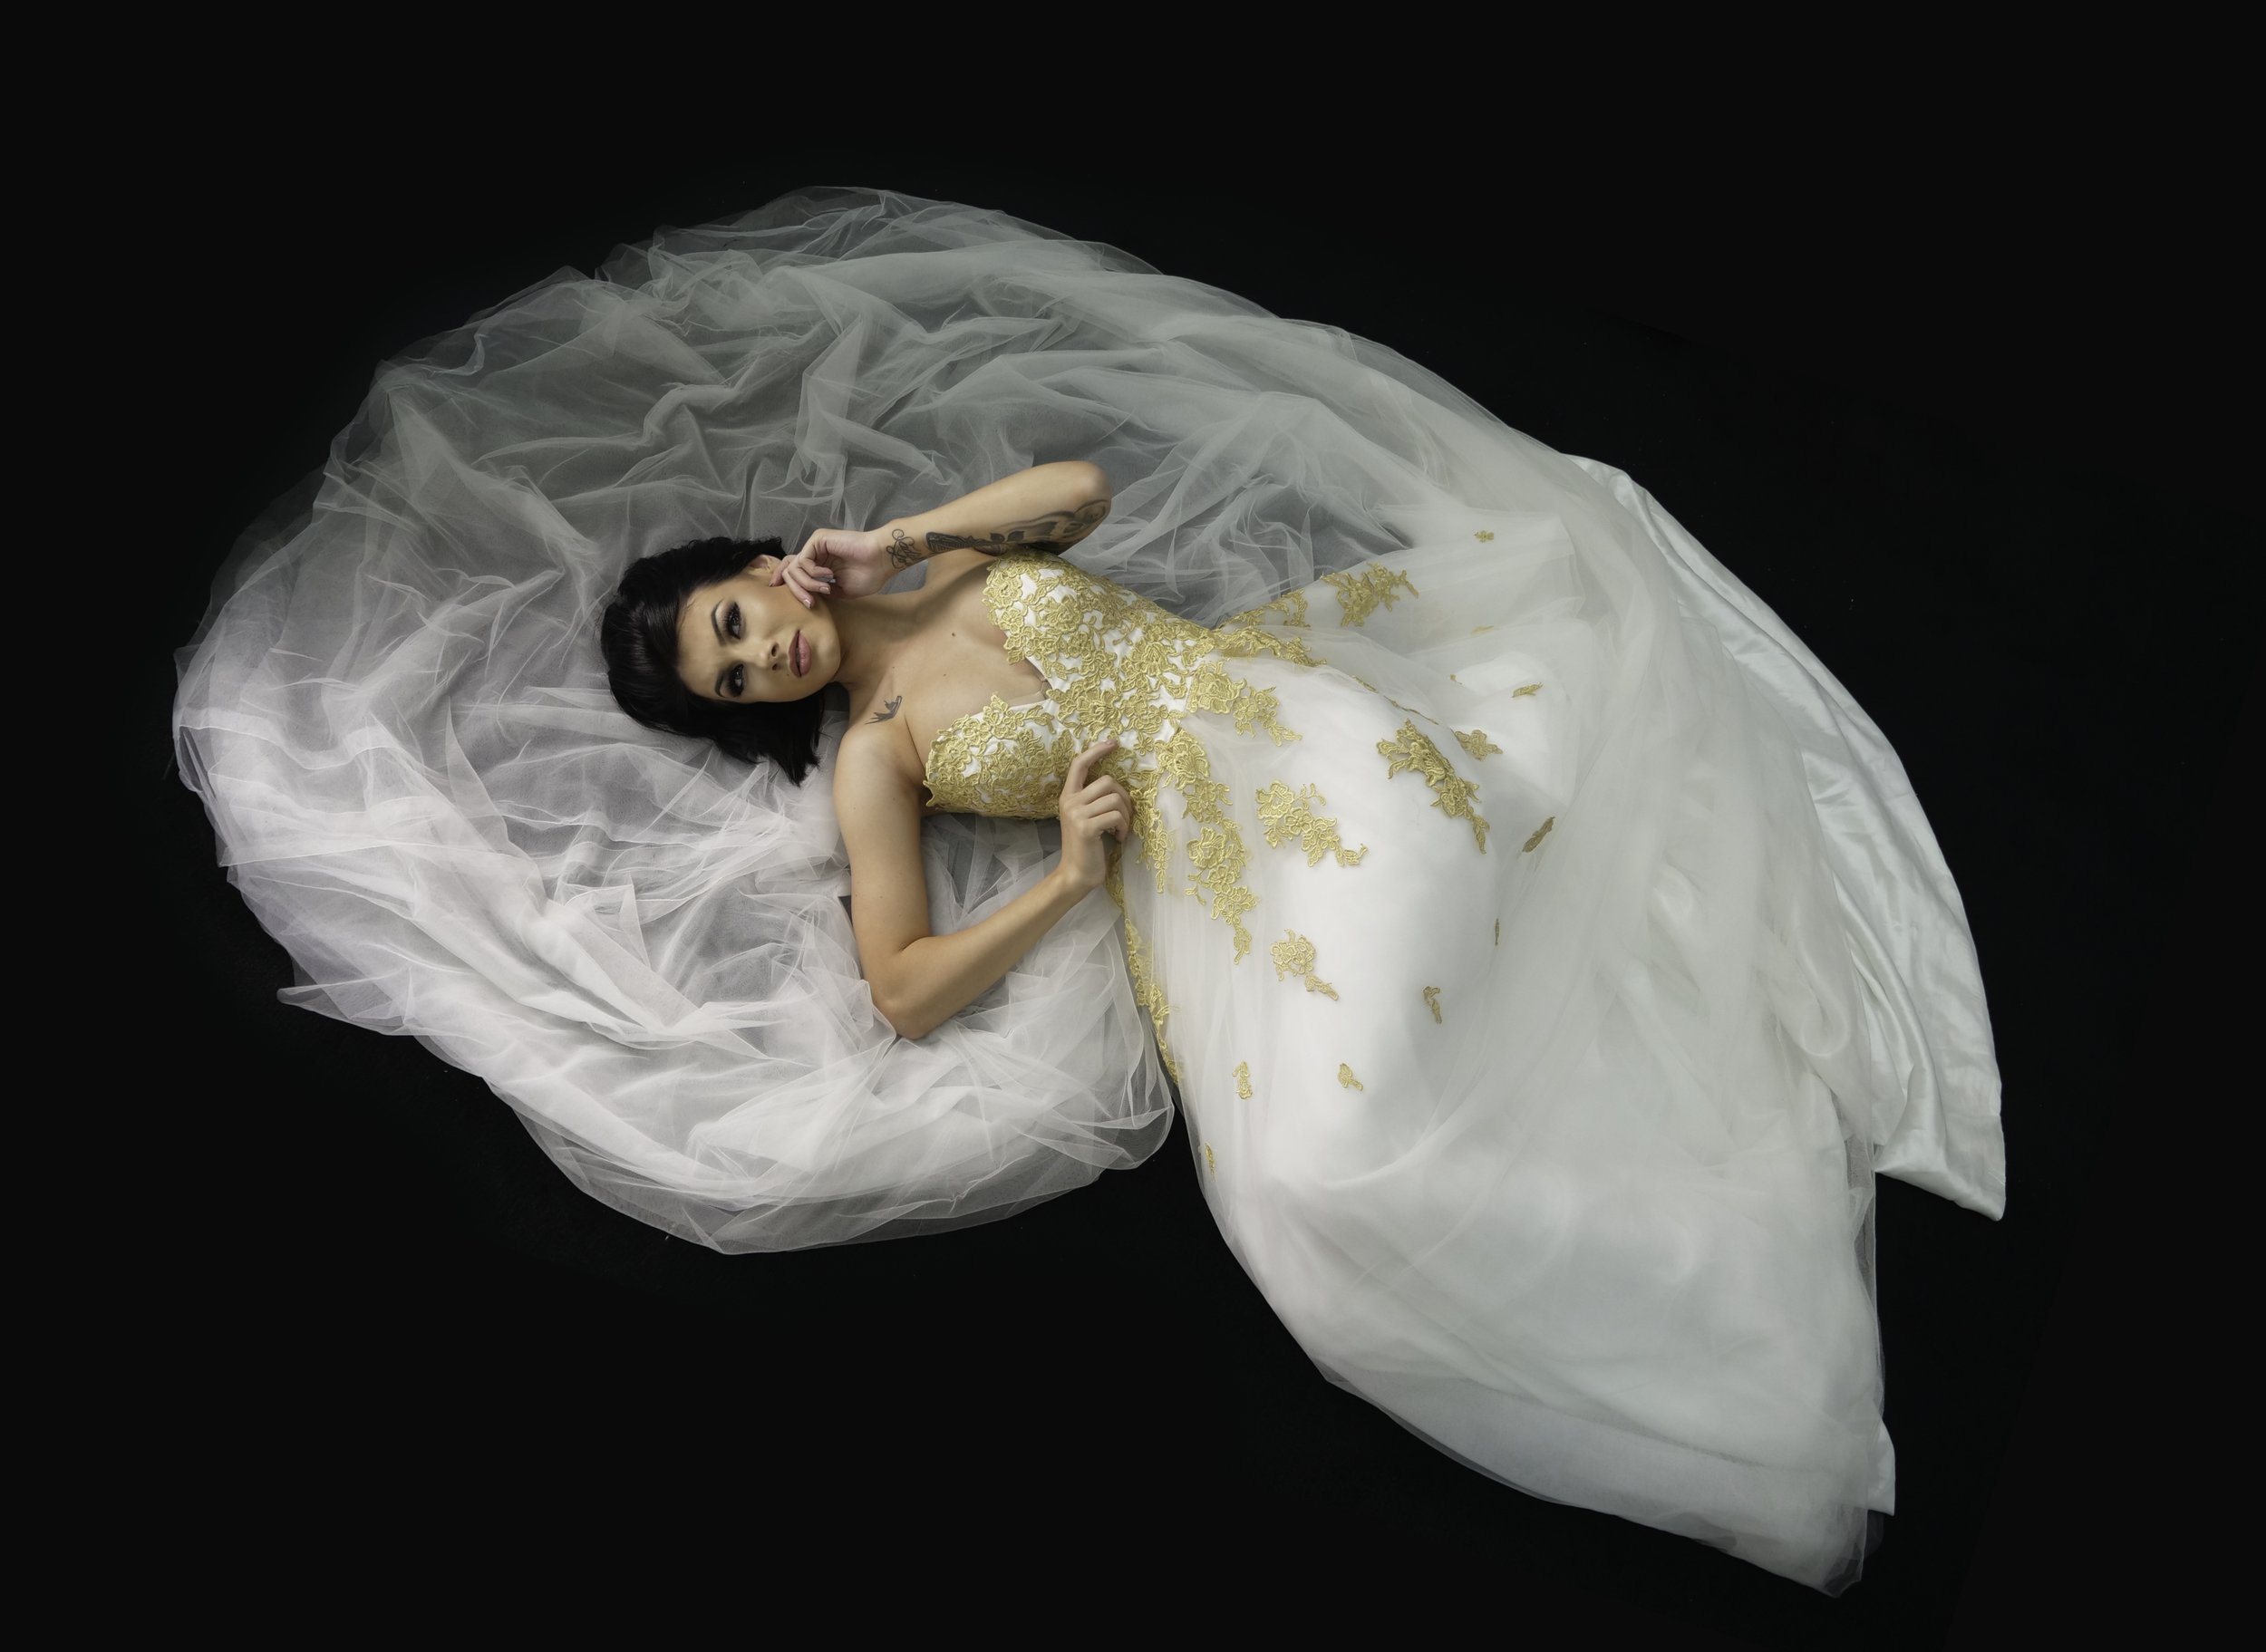
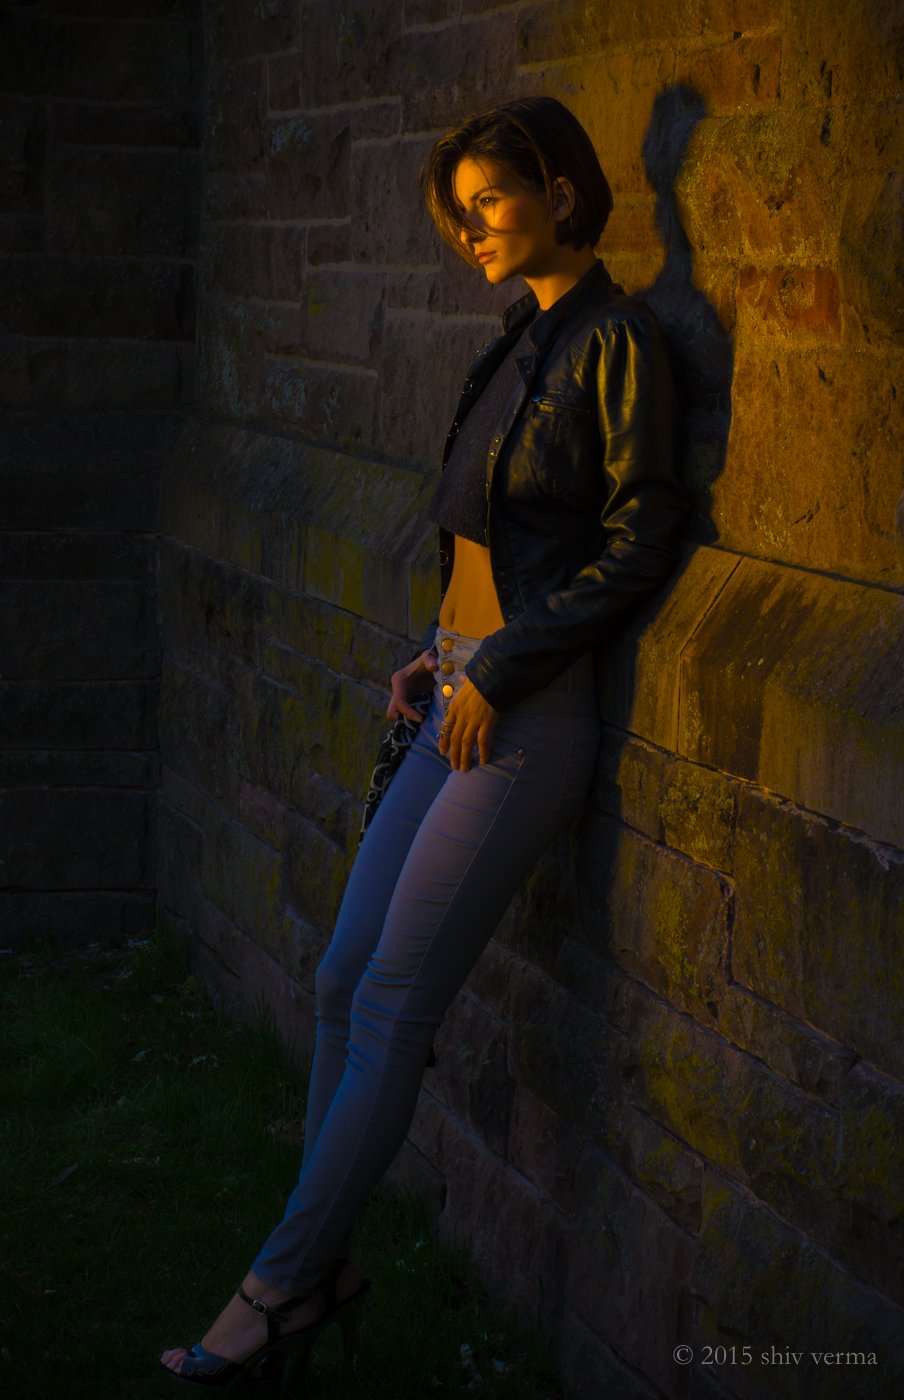 The 70 South Gallery - Lighting and Model Photography workshop was a huge success. Thanks to some great organization by "Adventures in Photography" (NJ, NY and New England) and the 70 South Gallery, Morristown, NJ. The workshop was sold out and we were fortunate to have decent weather for some of the outdoor shoots. I would like to thank the participants, the models and the organizers for all the hard work and support that made this so awesome.Studio lights were Profoto and Arri, outdoor speed lights were Nissin and personal on and off camera flashes. Lastolite reflectors and the Phottix Luna but dish were also incorporated in the various sessions.
Wine and Cheese
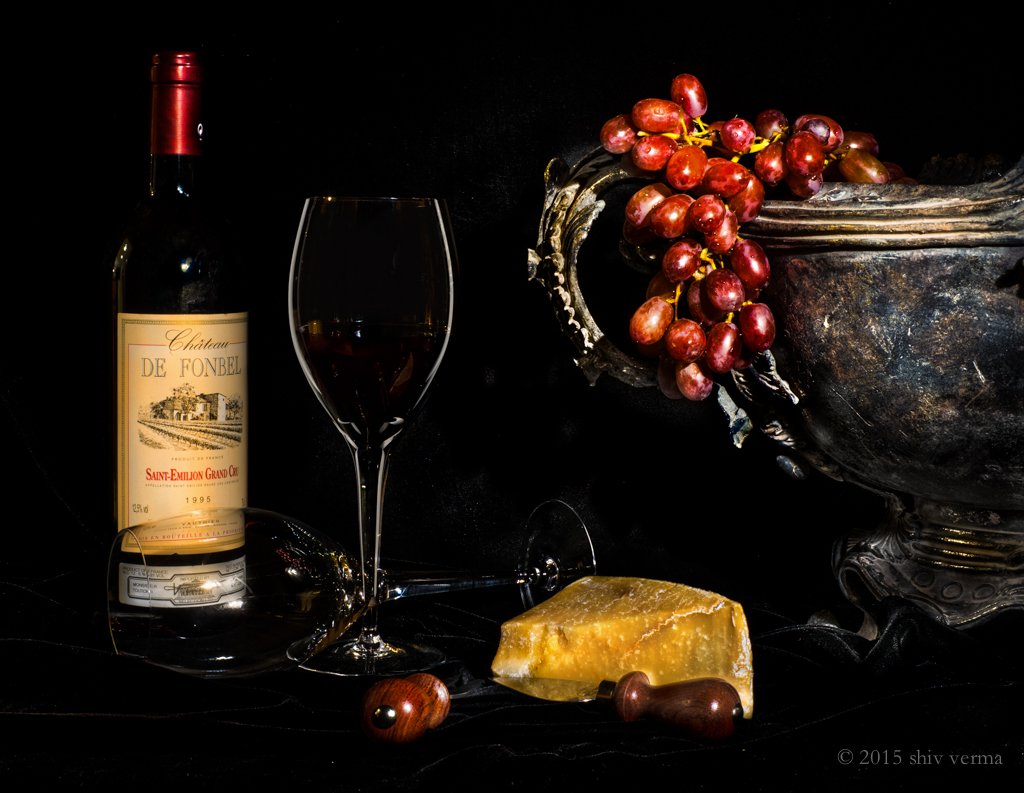
As the cold and snow continues, photographing indoors is always a good choice. This is another image created using light painting. Equipment: Sony A7R, Zeiss Touit 32mm f/1.8, Maglight (non LED) flashlight, Surefire LED flashlight. Exposure triad f/16, 30 sec, ISO 400. 5 image composite.Please click on the image for a larger rendition.
Light Painting - Still Life
 With all the snow and not many places to go, a little light painting seemed to be the thing to do yesterday. This also gave me the opportunity to test out the Zeiss Touit 32mm f/1.8 lens. Mounted on the Sony A7R in crop sensor mode the lens performed flawlessly. There was a fair amount of ambient light at 4:30 in the afternoon so I stopped down the lens to f/16 at ISO 50 that allowed an 8 second exposure. Individual portions were light painted and three images combined to create this final composite.Please click on the image for a larger rendition.
A Image Size Test with the Panasonic Lumix LX100
 To set the stage, the Lumix LX100 is a 12 MP camera that uses a 16MP sensor. As the camera can be configured for 3:2, 4:3, 1:1 and 16:9 aspect ratios, Panasonic has been successful is maintaining 12MP per frame utilizing portions of the 16MP sensor to its max. The LX100 is a small fixed lens camera and you can get the specs here.Many questions have been asked about Micro For Thirds (MFT) cameras and their ability to produce images ready for large prints. Keeping in mind that a majority of images these days are created and shown on computer screens and small portable devices. The maximum image size for the printed page for a magazine is 8.5 by 11.0 inches and for a double page spread 17.0 by 11.0 inches with a resolution of 240 to 300 DPI.So last weekend I shot a few images with the Lumix LX100 hand-held at a casual photo shoot. The lights were set for ISO 100 and f/8.0. Focal length 34 mm which is a 68mm equivalent.Here is one image cropped from the original size of 3456 by 4608 pixels to 2284 by 3416 (roughly 7.8MP or 2/3 the resolution of the effective sensor.Click on the image to see it full resolution.
 Next, I up-sized this image to 30 inches by 44 inches at 300 pixels per inch. The following image is a 5 by 7 aspect ratio crop 1165 by 1631 pixels.
 Feeling good, I resized the original crop to 60 inches by 90 inches at 240 pixels per inch. The final image is a 5 by 7 aspect ratio crop of a similar section 2148 by 3007 pixels.
 Resizing was accomplished using OnOne's Perfect Resize. No post processing, sharpening or clarity adjustments were made to the resized images. All OnOne defaults were left as is. Some degradation is apparent but as a result of jpg conversion.Hope this dispels the myth that a MFT image can't be made into a large print.
Fog - January 4, 2015
Today was the first day in 2015 that I picked up a camera and stepped out to see if I could get two images that I have been envisioning. The first was a tall lone tree in fog or mist the other I leave for tomorrow. I wanted it to be a monochrome image, B&W or cyanotype - I settled on B&W. The snow against the dirt and rocks adds to the scene creating a strong foundation for the rest that is mainly an ethereal sky.
What else is in my bag and more - Part 2
Here are some additional items I find useful. Some for the bag and others that are just good to have.
- Remote Shutter Release (wired or wireless) - A must have for tack sharp photography. There are 5 types available:
- A wired version that physically connects to your camera with a cable. Good for most photography when you are close to your camera.
- An Infrared trigger that is used to trigger the shutter using an IR beam (this requires you to be in “line of sight” to the front of your camera. These are usually OEM products but a few third-party devices are also available. I find these limiting.
- A wireless radio trigger. This is a two unit device - one is mounted and connected to the camera and the other is the hand-held controller. Hahnel and Phottix are the ones I use.
- An iOS or Android wired trigger. The smart phone is physically connected to the camera to trigger the shutter.
- The IOS or Android trigger. Here you use your smart phone and connect to the camera in WiFi mode to control and trigger the camera.
- Filter wrench (pair) - These come in two sizes and based on the lenses you have you may want to get both sets. Amazing how screw-on filters just don’t come off. The plastic wrenches allow you to apply pressure at the right places and lever the filter off so easily. Adorama branded wrenches are less than $5 a pair.
- LED Head Lamp - a must have when you are in the dark. Always carry one in your bag.
- Intervalometer - A must have device if you do any timelapse. long exposure, or multiple exposure photography. From basic wired devices to wireless units these are made most cameras including ones that have built-in intervalometers. Phottix, Hannel, Canon all make great units. Promote Systems makes a product called Promote Control, one of the finest devices not just an intervalometer but a whole lot more. The Promote Control will do focus stacking, automatic brackets of up to 45 images, with up to 9.0 EV step between shots for HDR. It can even automatically step into Bulb for night-time HDR! More expensive than the others but the Promote Control is my first choice.
Flash Photography:
- Flash Gels Filter gels are a great way to modify the color of your light but more important, they can balance the color temperature to match the ambient light. Roscoe and Rogue make excellent gels. My personal choice is the full set with the case and elastic band from Rogue. The Rogue set is around $30.
- Rogue Flashbender - These flash diffusers and reflectors are the best I have used. The come in multiple sizes and when used with the front diffuser, that act like a small soft-box. The cam be molded to direct light as needed or rolled up to form a snoot. These start at $20 for the Flashbender bounce card..
- Rogue Grid - If you need more control with the direction of the light from your flash the Rogue Grid is an excellent tool. The design features stacking honeycomb grids that produce 16, 25 and 45 degree grid spots. In addition you can get a set of bells that match the shape of the grid collar. The grid is under $50 and the gels will cost under $30
- Kupo Off-Camera Flash Alli Clamp - The clamp has a jaw that can clamp onto items up to 1.57" thick. Rubber nubs on the inside of the clamp prevent damage to paint or furniture. The clamp has a 5/8" receiver for light-stands or a 5/8" stud for super clamps with matching receivers. The Alli Clamp is topped with a metal locking shoe mounted to a rotating ball for your flash. I use it to mount my flashes, action cams, video lights and any other objects that need to held in place. Cost under $50. A lighter version called the Kupo Alli Clamp is for under $15.
Macro and Close-up
- Focusing rails and racks - These are ideal for precise positioning of a camera in X and Y directional axes. These come in single axis (front to back adjustment and 2 axis where a left right adjustment is also possible. Prices range for under $100 to $600 plus.
- Diopters or Close-up filters - This is one of the least expensive method of doing close-up photography. These filters attach to the front of your lens allowing you to focus closer hence magnifying your subject. They are available in single and dual elect construction. I recommend the dual element as you will have better optics. Prices range from $30 and up.
- Extension tubes - If you like macro these will allow your lenses to focus closer to the subject. As they have no optical elements in there is no image quality degradation. Kenko extension tubes are what I have and love. They come in a set of 12mm, 20mm and 36mm. For the newer mirrorless cameras the tubes are in sets of two at 10mm and 16mm
- McClamp The Clamp - This clamps to a tripod leg and can hold such items as gray cards and 12" reflectors, and small delicate subjects in place. It has a 26" flexible arm with a spring-loaded clamp to hold your subject in place. Wimberly also makes a similar device and have a new version called the Plamp II. Both products are about $45.
- Light Tent or Cube - A great light modifier for your product photography, food photography and macro work. These come in various sizes and cost $40 and up.
- Triflip (Trigrip) 6 in 1 or 8 in 1 reflector/diffuser - The TriGrip from Lastolite has a triangular shape with a built-in handle that allows easy hand holding or for attaching to a stand.The TriGrip is 30" at its widest point and collapses storage. I prefer this to the typical round diffuser reflector kits.
A few for those who dabble with video:
- LED Light Panels - these come in various sizes - remember to get one that is disable and has the intensity you need for your kind of video shooting.
- Variable ND filter - for those bright days when you need to slow your shutter down and keep your aperture wide.
- Shotgun microphone - DSLRs are great at capturing video. The audio on the other hand really is pathetic. The minute in-built microphones are really bad. So get a good starter microphone. A shotgun mounts on the hot-shoe and connects to the mic input port of the camera. My choices for a starter microphone is the Rhode Video Mic Pro with the Dead Cat for around $210
Please use the comment link on the top of this post to share with us some of your special items.If you do plan on getting any of these items please use my affiliate links on the right column of this blog post or use the Products and Discounts Page for additional links.
What else is in my bag - Part 1
Apart from cameras, lenses, filters we as photographers carry a number of gizmos to help our image capture. This is part 1 of my list of gizmos. These are all reasonably priced and many are less than $10. Most on-line photography stores carry these items and you should check them out.
- Gray Card – Get your exposure right. Available in cardboard and durable plastic these are one of the most valuable tools for your camera kit. The camera may be smart but it is easily fooled. It will under or over expose very bright or very dark scenes. You should use a gray card to set the exposure for much more accurate results. Some of the newer cards come as sets with a black and white card. This can also help you set your white balance. A step-up would be the X-Rite Color Checker Passport.
- High velocity blower - Never clean your lens without first blowing off any dust, grit or lint. The last thing you want is to scratch your lens as your clean it with a lens pen or lens cloth. A good blower costs under $10 - the one I like is the Visible Dust Manual Blower. Adorama and B&H have these.
- Lens Pen - This is another must have tool for your bag. There are many manufacturers and models available. The ones with a carbon bad need to be activated before each use. Others like the Allsop have replaceable tips. I keep an Allsop in each of my camera bags.
- Lens Cleaning Cloth - A good lens cloth is a must in your bag. Zeiss makes some of the finest and can be purchased from Walmart and B&H for $3 and up.
- 1 or 1.5 inch natural bristle soft painter's brush - An ideal too to get lager dust and sand particles off your equipment. Keep one in your bag - you will be happy you have it on those dusty trips.
- Small micro fiber or cotton hand towel - You never know when you will need it. These are great for wiping of moisture from your gear on those wet days. Grocery stores and Bed Bath & Beyond carry these.
- Spray bottle - You may not always get a dewy morning but you can create dew on flower petals and spider webs with a handy fine-mist spray bottle. Fine mist spray bottles can be found for under $2 at Amazon.
- Bubble level - A three axis bubble level for your hotshot mount will keep your horizons level. If you have an inbuilt electronic level in the camera then you can skip this tool.
- Elastic bands and small ziplock bags - You will find many uses for this combo. A lost lens cap can be a problem but not if you can put a ziplock bag around the front element and secure it with an elastic band. If your zoom lens tends to creep the elastic band can help keep it in place.
- Large garbage bag - During any outdoor shoot I always pack one or two large garbage bags in my bag or in the car. They are great when you need some rain protection, need to keep your equipment on the salty sand, need to lay down at ground level when shooting low to the ground. A black garbage bag acts as a great gobo when needed, translucent bags make great diffusers.
- Gaffer's tape - 1 inch width in black, a small roll is perfect to secure items when needed. This is a must have to tape down your lens at infinity when doing any astro photography. A small piece can be used to cover the eyepiece of the viewfinder, preventing stray light from spoiling the exposure. It is also a great all around repair tool.
- Parchment paper, issue paper, or rip (stock) cloth - A small piece about 4 inches square is good but larger pieces can be useful for other situations. You can tape this (using gaffer's tape to your flash to diffuse the light. If you keep a larger piece you can have someone hold it to diffuse bright sunlight while doing close-up or macro photography. Get parchment paper any kitchen or grocery store. rip stock can be purchased from a fabric store or on-line.
- White foam-core - This makes a great reflector, if you need a silver reflector keep some kitchen foil and fold it over the foam-core. You can use the foam-core as a gobo or even as a white background for small subjects. Staples, Office Max, Michael’s or A.C. Moore are ideal for this.
- LED Flashlight - a must have when you are in the dark. A great tool for light painting and when you need just that added light for filling in shadows or adding a highlight. My favorites are Coast and SureFire (SureFire lights are available from the SureFire website and Amazon). Others can be purchased at Home Depot, Amazon or Lowes carry great LED Lights
- Small notebook and a ballpoint pen - Journaling is key. Write down locations, notes, day and time of best light, etc. Draw sketches of what there is so you can come back for better images. If nothing else - you can use it to jot down names and contact info of fellow photographers you meet.
In the near future I will follow-up with additional items I find useful. Some for the bag and others that are good to have. In the mean time, why don't you use the comment link on the top of this post to share with us some of your special items.If you do plan on getting any of these items please use my affiliate links on the right column of this blog post or use the Products and Discounts Page for additional links.
Nissin i40 - an exceptional pocketable flash
 I had been anxiously waiting for the two evaluation units to arrive and finally they arrived two days ago, December 15, 2014. The small Nissin i40 is made for Canon, Nikon, Micro Four Thirds, Sony and Fuji cameras. With a current street price of $269 this is a very affordable unit.In the box is the flash head, a stand with a metal 1/4 20 thread for mounting on a light stand or other device, a diffuser, and a quick start instruction manual. A nice belt mountable pouch for carrying the unit is provided and they include a carabiner so you can attach the pouch to any belt, strap or camera bag loops and rings. A spare set of AA batteries fits nicely in the diffuser so you can carry enough reserve power in one convenient pouch.The i40 weighs 7 oz and fully extended is under 3 1/2 inches. The unit is powered by 4 AA batteries and unlike the larger Nissin flashes this does not have a cartridge system for the batteries. With a guide number of 40 or at ISO 100 of 131' at 105 mm and 89' at 35 mm position, the unit is suitable for most photographers who like to carry a handy flash for fill as well as indoor photography needs.
 The power zoom range is from 24 mm to 105 mm without the diffuser and 16 mm with the built-in diffuser in position. The flash is mounted on the camera hot shoe using a spring-loaded locking mechanism that is very convenient. The flash-head tilts up 90˚ in four stepped positions and rotates 360˚ in 30˚ steps.In addition to the flash light source, the i40 includes an LED based video light with variable power output.Triggering the i40 requires you to either mount it to a hot shoe or remotely trigger it wirelessly using the cameras built-in trigger.There is no LCD panel and all controls are via dials on the back panel. Unfortunately these are not illuminated and pose a slight problem in a dark environment. Clearly the dials are designed for ease of use and they do just that.
 For purposes of this review I am using the i40 designed for Micro Four Thirds cameras and all my testing was done with the Panasonic GH4 and some additional testing with the Olympus OM-D E-M1.Size and Weight: This is a very small unit comparing it to a Nissin 8000, and the Nissin 466 (also designed for MFT cameras), the i40 is totally dwarfed. Without batteries the unit weighs 7.17 oz and with four AA batteries the unit weighs 11.0 oz. The pouch, diffuser and stand add another 3 oz.
 Battery Compartment: Unlike its larger brothers the i40 does not have a removable battery cartridge. You slide open the door and insert the batteries as marked. The makings are well identified and you are not likely to insert the batteries wrong. To close the battery door you need to push the door down over the batteries and simultaneously slide it into the locked position.
 Mounting to a hot-shoe or stand: All you need to do is to slide the Nissin i40 into the hot-shoe slot. A spring-loaded mechanism secures the unit in place. To remove the flash head, you need to push a small unlock button and then slide the unit off the hot-shoe.
Operation:
To turn on the i40, lightly depress the power button. The power indicator light will turn red and once the unit is charged the light will turn green. Concurrently the zoom feature will initialize.
Controls & Modes
As mentioned earlier, the i40 controls are two dials and indicator LEDs. The dial on the left side of the back panel is used to select operating modes while the one on the right is used to adjust power or exposure compensation (depending on what mode you use).
Modes:
I will address each mode as the mode dial is rotated clockwise.Video (Indicated with a video camera image) — in this position the Video LED is powered on. The LED intensity can be adjusted in 9 steps using the TTL exposure compensation dial on the right.SF - the i40 will trigger on the first flash it sees — this is ideal for use with other flash units set in manual mode or for use with studio strobes.SD - the i40 will ignore any pre-flash from a master unit and trigger on the main flash TTL - TTL is supported and indicated by the two LEDs, the Mode LED and the TTL exposure compensation LED. In TTL you can adjust the flash exposure compensation from + 2.0 to - 2.0 in 0.5 step increments. I found this to be a very easy to use and convenient feature. It is so much easier than having to push +/- buttons and review readings on an LCD window. The performance of the exposure compensation dial and flash out was very accurate as measured with a Sekonic L-758DR Digital Master Light Meter. Tests were done using both a Panasonic Lumix GH4 and an Olympus OM-D E-M1. A (The green A) - This is the Automatic Mode and is identical to the TTL mode without any exposure compensation. In this setting only the mode dial LED is illuminated.
 M - Manual Mode - here the mode dial indicator LED and the middle LED are illuminated. The power output dial shows the output in 1 stop increments from 1/1 to 1/256.A, B, C (white lettering) — this is the slave TTL / Manual mode and the unit can be set to any one of three slave groups A, B or C. Testing this feature with the Panasonic GH4 and Olympus E-M1 allows the camera to control the flash from 1/1 to 1/128 power. This feature is not available on the Fuji version.High Speed Sync (HSS) - This is not an intuitive or marked setting. To set HSS you need to hold the pilot lamp button for 3 seconds till the LED starts blinking. Similarly, to turn it off hold the button down for anther 3 seconds till the lamp stops blinking. Powering the unit on and off does not reset HSS it will say engaged till you turn it off. The i40 will let you use shutter speeds of up to 1/8000 Using this mode I was able to shoot up to 1/8000 shutter speed with no problems. High Speed Sync is only supported in A, M, TTL or wireless mode. To enter HSS mode hold the pilot button (the LED next to the power button) for 3 seconds, or until the left LED starts blinking. To exit HSS mode hold the pilot button for 3 seconds or until the left LED stops blinking. This is true only for the MFT and Sony versions. For canon and Nikon, you activate this function in the menu of the camera and it will pass through to the flash. Fuji does not currently support HSS so it is not a feature on that version of the i40 flash.
 Zooming - the i40 will automatically zoom to the closest focal length of the lens mounted on the camera as long as the lens has electronic communication with the camera body. As many mirror-less camera users are using adaptors with non OEM lenses, there may be no electronic communication with the body and hence the flash will not zoom even when mounted on the camera. To set the zoom manually in such situations or when using it remotely you will need to hold the power button down for three seconds and wait for the pilot lamp to change color. Colors will cycle a deep blue(24mm) to pink(50mm) to blue(80mm) to orange (105 mm). These zoom ranges and colors are conveniently printed on the body of the flash head and exposed by sliding the bounce flap upwards.
Other features:
- Flash Color temperature 5600 K
- Flash duration 1/800 sec full power to 1/20,000 sec on the lowest power
- Focus Assist lamp is positioned immediately above the hot-shoe mount and assists during low light focusing.
- White Bounce Flap is built into the unit and enabled by sliding it upward from the rear of the flash head. Of significance is that the bounce can be used in conjunction with the diffuser in place. This provides for some really nice lighting.
- Wide Angle Diffuser is also built-in and you need to pull it out using a small notch from the front of the flash head. It is spring-loaded and flips flat to the flash head’s lens.
- An optional diffuser is include with the i40 and is easily mounted on the head when needed. It is conveniently stowed in the provided pouch.
- As with most speed-lights excessive firing of the flash at high-powered can result in overheating. The i40 has a built-in thermal protection system. When the thermal protection is triggered, the pilot lamp will blink red.
- Auto focus assist beam with a range of 2.3 to 16.4 feet. Please note that this feature is not available on most Micro Four Third Cameras - Panasonic and Olympus cameras tested do support this feature.
- Good battery life — approximately 220 (full power) to 1,700 (minimum power) flashes on a single set of fully charged batteries
- Video light run time is approximately 3.5 hours
- A well designed stand with metallic 1/4 20 mounting threads.
Pros and Cons
Pros:
- Very light and easy to carry
- Good mechanical mating with the hot shoe
- Easy to use control dials
- Appropriate power for its size
- Good wireless capability
- HSS is a great feature for a flash this size
Cons:
- No audible beeps for flash ready after recycle indication
- Dials can be inadvertently rotated. A push down to adjust feature would be better
- Hard to see dial settings in the dark. Backlit dials would be preferable
Conclusions
Given the Nissin i40’s size and weight it will find a permanent place in my camera bags, particularly for the Panasonic GH4 and Olympus OM-D E-M1 configurations. It has enough power for most indoor situations and is ideal for fill light outdoors. The few points mentioned in the Cons section could be easily implemented in the next generation. On a scale of 1 to 5, I give the i40 a rating of 4.5
Additional Images:


Diaphanous Flowers - Rose of Sharon
This is the fourth flower in this series. A Rose of Sharon from the yard. This one was lit from the side and the back with a low intensity cross fill. All lighting for these images have been cool LED lights, daylight balanced. Once again please click on the image for a larger view.