
MIOPS Smart Trigger Review
 I purchased the MIOPS Smart Trigger last summer after seeing it being used by a few photographers in Europe. This a combination trigger, intervalometer, remote and a whole lot more. The nice part is that it is well built, small and light. The MIOPS can be purchased for $220 to $240 based on the camera cables you need.The unit measures approximately 2.5 in. X 4.0 in. and weighs just under 4.0 oz. including the battery.The MIOPS trigger has six modes of preprogrammed operation and one “Do It Yourself” port. A really useful feature is that you can vary the sensitivity of each of the modes as appropriate. The controller is very durable. I have had it in my bag for over 1 year and is does not show any signs of wear and continues to perform very well.A 128×128 pixel, full-color display, is mounted just above the large buttons, used for operation and selecting menu options on the front of the trigger.The device is powered by a 3.7 V/1020 mAh. lithium-ion rechargeable battery.The MIOPS can be used with Sony, Panasonic, Olympus, Canon and Nikon, as well as other brands. The trigger hardware is identical for all configurations with the exception of the supplied cables that need to match the I/O ports of your camera.
 This allows you to use one MIOPS with various camera models as long as you purchase the right connection cables.The trigger unit is used in two ways, either to trigger an external flash or to activate the shutter of your camera. Flash units are connected via the PC sync jack, and cameras are connected via the remote shutter release jack.
 The MIOPS internal (replaceable) battery can be charged via a micro-USB cable and any USB charger or your PC’s USB Port,The MIOPS is manufactured using a strong plastic with well configured, raised push button controls. The screen is an LED display and is easy to read in most lighting conditions. It has an internal microphone and a light-sensitive sensor for activating laser and lightning modes. For the DIY mode, an additional port is provided that can be connected to an external sensor.The trigger can be mounted using the camera hot shoe or on any support that has a 1/4 20 screw mount.The MIOPS can be used remotely via the free MIOPS smartphone app for IOS and Android phones.For triggering with the MIOPS it is best to set your camera to manual exposure and manual focus.


 HDR Mode: this is a mode that is good for cameras that either do not have an internal bracketing mode or where the camera is limited to just the 3 shot bracket. The MIOPS trigger will allow you to set 3, 5, and 7 shot brackets. I prefer to use the camera’s internal bracketing/HDR modes.
 Scenario Mode: works in combination with the smartphone app. You can store up to three different scenarios to the MIOPS to be executed later. When you create a new scenario and run it, it will be also stored to the MIOPS. You can run each scenario later. To make any change you must do it via the app on the phone. The scenario mode screen lets you choose one of three previously stored scenarios. The screen will display which step is currently running and when the scenario ends, the MIOPS will return to the selection screen.
In conclusion, I have no hesitation in recommending the MIOPS Smart. There are a number of other features that are available when you use the smartphone app that I will leave for a future post.MIOPS Triggers are available at Hunts Photo & Video - here is a link to the Panasonic Version - use the search field for other versions. For more information, you can visit the MIOPS web site at www.miops.com
Review of the Platypod Pro Max
 A while back I had done a review of the exceptionally versatile and compact Platypod Pro® Deluxe Kit. Now the makers have introduced a follow-up to the Platypod Pro called the Max.Much planning, engineering and fine machining go in to making the Platypod Pro® Max. The Max’s initial form is stamped out of a 5mm thick sheet of aircraft grade aluminum maintaining absolute flatness. Using Computer Aided Manufacturing (CAM), the plate is computer machine precision drilled for all holes and slots. Edges are round-routed and holes either threaded or chamfered to avoid any sharp edges. Key holes slots for attaching the spike screw box are drilled only partway through the plate with very low tolerances to allow easy but firm attachment. These last holes are invisible from underneath the plate.
 I have been informed by the manufacturer that the machining quality and workmanship on the Max is so meticulous that despite computer aided manufacturing the factory can only produce 1500 every 25 days!Like the original Platypod Pro the Platypod Pro Max is a sturdy flat mini tripod ideal for low-angle shots and situations where traditional tripods are cumbersome or impractical. It is however, significantly larger, has four spikes/reversible rubber feet rather than three, a belt loop, a single 3/8 inch 16 ball head mounting screw and a 1/4 inch 20 removable stud to mount accessories.
 Here is an image captured with the Max set up on top of the stone wall at Tunnel View - Yosemite NP.
 Unlike its smaller brother the Max supports ball heads of any size and is rated to support 300 pounds. A 3/8 inch 16 threaded screw hole allows you to mount the Max directly to your tripod as and when needed. Made of aircraft grade aluminum anodized black with beautiful self-explanatory laser etchings, the Max comes in a red microfiber drawstring pouch.
 If you already own a Platypod Pro the Max does not replace it, rather it compliments it where situations demand a larger base or when you need to physically move your low lying camera rig across the sand or grass when photographing wildlife.Specifications:
- Base - 6061 black anodized aircraft-grade aluminum. 5 mm thick. 5.25 x 7.75” (5-year warranty—Full replacement of parts for any defect in workmanship.)
- Fiberglass-reinforced nylon removable "bayonet style" storage box mounted onto plate to hold four 1/4-20 spikes, 2 inches long, with heavy-duty rubber feet and locking nuts. Small magnets keep spikes in place for storage.
- Five 1/4-20 threaded holes strategically placed to allow use of spike feet in configurations of one, two, three, or four at a time.
- Two 2-inch belt slots to secure to any cylindrical object or to tape onto floors for remote camera setups.
- 1/4-20 and 3/8-16 accessory threaded holes for attachment to tripods or quick-release devices under the unit.
- 3/8-16 TA2 titanium photographic bolt drilled and countersunk through the plate and welded in place for large tripod ball heads, such as the RRS-BH55, even with spike-feet in place.
- Two non-threaded holes for permanent or semi-permanent mounting to floors, walls, ceilings or panels.
- Weight: 13 ounces, including spikes and storage box.
At approximately 5 x 8 inches it is about the size of an iPad Mini and fits well in any camera case that has a slot or pouch designed to hold a laptop or an iPad. As an option you can use either slot or one of the non-threaded holes and a carabiner to hang the Max from your belt or a loop on your backpack. As compared to the original Platypod Pro, Max’s larger footprint means more stability. Like the Pro, Max is made of aircraft-grade aluminum with an embedded 3/8-inch titanium bolt. However, it does come with a few features, including a pair of slots that can secure Max via a bungee cord, zip-ties or even your belt to freestanding objects and structures. In the center are 1/4- and 3/8-inch holes to attach Max to quick-release devices, such as the Peak Design Capture Clip, or directly onto a tripod center column. A very convenient 1/4 - 1/4-inch male cross-nut allows attachment of flexible arms, speed-lights and numerous accessories. Here I used a Novoflex Flex Arm and a Lume Cube LED to light the crystal. The camera is a Panasonic GH4 with a 30mm Lumix macro lens. A second 1/4 - 1/4 and a second Flex Arm would be ideal for cross lighting a macro subject.The Max‘s larger base allows use of most any ball head. The RRS B55 is the largest ball head I own and I had no problem attaching it to the Max and all the knobs have adequate clearance. As I no longer use large DSLR’s all my tests were done with Sony and Panasonic mirrorless bodies. Using the Max with an A7RII and the 70 – 200 mm f/4.0 lens was a breeze. I also mounted a Panasonic GH4 with the new Leica 100-400 using a Wimberly SideKick for quick reaction time and maneuverability. When using the Sidekick it is imperative that you remove the holder for the spikes with a simple twist and place the cross-nut in one of the corner positions, out-of-the-way. This gives the sidekick the clearance for 360 degree rotation. The Max supported this rig very well.
 With the Platypod Pro you had to be careful mounting heavier gear. It was best to ensure the center of gravity was as close to the center of the Platypod Pro mounted ball-head. With the Max, this is a less of an issue. With a medium or large ball head the Max will comfortably support most DSLRs and mirrorless cameras fitted with normal to long telephoto lenses. A super telephoto lens properly mounted on a good ball head works well too. Here as in the image below I tested it using the RRS BH55 and the Wimberley Sidekick with a Canon 500 mm f/4.0 lens attached to a Sony A7R II using a Metabones IV adaptor.
 Similar to the Platypod the Max is ideal great for ground level photography and videography, a mount for action cameras and for creating panoramas. When creating panoramas use a pan/tilt ball head like the Unique as shown below or attach a leveling base (see following image) below the ball head as shown in an image above where the RSS BH55 is mounted on top of the Acratech 1170 leveling base. As the Max is made of a relatively thin aluminum plate it would be difficult to have a built-in level. A third-party bubble level can be adhered to the max or simply place on it to level the Max. When it is necessary to level the Max it is best to use three of the four spikes or rubber ends. Four legs are great for stability but not so for leveling. The Max is best used without spikes or feet when you want to have the flexibility of sliding it in any direction on flat surfaces, sand or grass. When friction is important then the spikes are the best option. In the reverse orientation the rubber caps not only provide friction preventing the base from sliding around but also prevent damage to furniture, painted surfaces, etc.
 For surfaces like asphalt, rocks and brick the spikes are your best choice for stability. To attach the base plate to a fence post, rail or tree limb, a pair of bungee cords, straps or your belt work great. All you need is to secure the cord around your object and hook the ends into the slots or holes in the base plate. Belts and straps can be passed through the slots on each side of the Max to secure it to any post, tree trunk or similar object.The Max with its little brother the Platypod Pro have a permanent home in my photography kit. I find I am using these support systems more than using my tripods.More on the Platypod products and their web siteAll company names, products and devices mentioned in this review are trademarks of the respective companies, registered in the U.S. and other countries.
PANASONIC LUMIX G LEICA DG SUMMILUX 12mm, F1.4 ASPH Lens announced
 Following up with the release of the exceptional Leica 100 - 400 mm nature and wildlife photographers' dream lens, Panasonic has announced a new Leica 12mm (24 mm equivalent on MFT bodies) f/1.4 weather sealed wide-angle prime lens. Suitable for great landscapes and with this f/1.4 speed it will be ideal for astro photography. This will be Panasonic's widest non-fish eye prime lens in the MFT lineup. Hope to have one in my kit for my Iceland workshop in September.It will be available later this summer for $1300 (rounded).Here is the press release:NEWARK, NJ (July 1, 2016) – Panasonic unveiled a new LEICA DG SUMMILUX 12mm/F1.4 ASPH. (35 mm camera equivalent: 24 mm) digital interchangeable lens for Digital Single Lens Mirrorless camera based on the Micro Four Thirds standard. The new 12mm wide-angle lens enables photographers to capture beautiful group, event, and nature photography. It also allows indoor shooting in low lighting and produces an impressive, natural defocusing effect with its F1.4 aperture. In addition, the LEICA DG SUMMILUX 12mm/F1.4 ASPH. boasts a rugged, splash/dust-proof design (when combined with splash and dustproof LUMIX G Mirrorless camera models) to meet the needs of a wide-range of photographic situations.Integrating two aspherical lenses, two UED (Ultra Extra-Low Dispersion) lenses and an ED (Extra-Low Dispersion) lens, the lens system is comprised of 15 elements in 12 groups. The adoption of five special lenses makes it possible to meet the stringent LEICA standard for exceptional image quality with high resolution and minimum distortion. In general, flare is commonly seen around the periphery of a point source with many high-speed lenses when a large aperture is employed. However, the new LEICA DG SUMMILUX 12mm/F1.4 ASPH. achieves high resolution from the center of the image to the corners by suppressing this flare. Users can take advantage of this lens to shoot a brilliant night skies or night scenes containing illumination to capture true-to-life images with minimal blurring and distortion at the edges. The multi-coated lens elements also minimize ghosting and flaring.Incorporating an inner focus drive system and a stepping motor, the new LEICA DG SUMMILUX 12mm/F1.4 ASPH. is capable of smooth, silent operation together with the camera’s high-speed, high-precision contrast AF system for both photo and video recording. It is also compatible with the sensor drive at a maximum of 240 fps to take full advantage of cameras with high-speed AF. This stunning AF performance is excellent for recording 4K videos, where precise focusing is essential.The LEICA DG SUMMILUX 12mm/F1.4 ASPH. comes with an aperture ring for direct, intuitive aperture control. Nine blades give the aperture a rounded shape that produces an attractively smooth effect in out-of-focus areas when shooting at larger aperture settings. A highly reliable metal mount assures durability for repeated use. The lens mount, the barrel and the hood are all made of metal to provide a sleek, sophisticated design that matches the entire line-up of LUMIX G Digital Single Lens Mirrorless (DSLM) cameras.Specifications:
| Focal length | 12 mm |
| Maximum aperture | F1.4 |
| Minimum aperture | F16 |
| Aperture ring | Yes |
| Number of diaphragm blades | 9 |
| Elements | 15 |
| Groups | 12 |
| Special elements / coatings | 2 aspherical lenses, 1 ED lens, 2 UED lenses |
| Minimum focus | 0.20 m (7.87″) |
| Maximum magnification | 0.1× |
| Autofocus | Yes |
| Motor type | Stepper motor |
| Weight | 335 g (0.74 lb) |
| Diameter | 70 mm (2.76″) |
| Length | 70 mm (2.76″) |
| Filter thread | 62.0 mm |
| Hood | Yes |
One Day Workshop Schedule
ALL ONE DAY WORKSHOPS ARE TEMPORARILY SUSPENDED
Workshop details are available from the Registration Page.
Macro and Close-up Photography
Flash Photography, High Speed flash, creative lighting
Portrait and Lighting Techniques
Digital Photography A-Z. This is a one day three part course that will teach you camera basics, post processing and printing.
The Digital Darkroom - a course that covers image capture, asset management, processing and enhancement, output to print and web media. A one day program for digital image making workflow
Timelapse Photography, post processing and video assembly
If you have any questions or would like more information please call 617-759-0010 or email sv@shivverma.com
Please use this REGISTRATION link to register for these workshops.
Light of Cape Cod - Photo Workshop
 A 4 day 3 night photo workshop that includes lodging and site feesMid Spring in Cape Cod is a multi faceted photo opportunity with truly spectacular scenics and some wildlife. The tourists have not crowded the roads and traffic is not a nightmare. This very special workshop is for all levels of photographers from beginner to advanced. The Cape provides some of the most incredible landscapes and seascapes and the light during spring is exceptional. We will explore and photograph the Cape's classic sea shore, sand dunes, light houses and some wildlife (including migratory birds). We will determine schedules and locations based on weather forecasts, tides and sunrise/sunset times. We may even explore the opportunity to do some night photography.(CLICK HERE FOR DETAILS)
Iceland - Sept 17 - 25, 2016
 Plans for the 2016 September Iceland photo tour and workshop have been finalized. Exceptional fall colors and if luck prevails, the Aurora Borealis will make this trip exceptional.From the western peninsulas of Snæfellsnes and Reykjanes to the exquisite south coast including the exquisite black sand beaches and icebergs in Jökulsárlón and surrounding areas this trip is designed for all levels of photographers. This trip is limited to a maximum 10 participants.All Iceland photo tours and workshops for the past 4 years were fully subscribed within a few days so please register as soon as possible.CLICK HERE FOR DETAILS
Wild Flowers, Smoky Mountains and Cades Cove - Spring Workshop
 April 17 to 22, 2016 - Six Day 5 Night Photo WorkshopGreat Smoky Mountains National Park is a world-renowned preserve of wildflower diversity over 1,660 kinds of flowering plants are found in the park, more than in any other North American national park. In fact, the park is sometimes referred to as the “Wildflower National Park.” From the earliest hepaticas and spring-beauties in the late winter to the last asters in the late fall, blooming flowers can be found year-round in the park. Wildlife is fairly abundant in Cades Cove and we will have opportunities if lucky, to photograph bears. Landscapes, rivers, waterfalls and much more - a photographer's paradise.CLICK HERE FOR DETAILS
Review of the Hähnel Captur Module Pro, Captur Module - IR and the Captur Receiver
Hähnel Captur Module Pro remote trigger with sound, light, laser and IR triggering. Hähnel of Ireland has replaced the wonderful Giga T pro with Captur Module Pro. Capture is high-speed trigger system that will provide remote triggering, intervalometer functions, delay triggering, long exposure and will will also work as an ordinary flash trigger.Some of the more interesting features are sound, light, laser and infrared sensors for high-speed or wildlife photography. What is even better is that the system has an auxiliary port. This allows you to use any third part triggering devices to be connected to the Captur Module Pro that in turn will trigger your camera.The basic kit comes as a set of two devices. A hand held control unit and a IR transmitter. You will need an optional wireless unit to control your camera wirelessly. The controller is a 2.4GHz transmitter with a range of 320 feet. It will work with either shoe-mount flashes or studio lights as there is a hot-shoe and a sync port. There are models for Nikon, Canon, Sony and Olympus/Panasonic. Best of all the modules all use AA batteries.Features:
- Captures Time Lapse Photography, High Speed Photography, Motion & Wildlife Photography
- Four built-in sensors (light, sound, Laser & IR). The package indicates five built-in sensors however there are four sensors (three windows) and an auxiliary port that can accommodate an infinite variety of sensors and triggers.
- Auxiliary port allows to connect 3rd party sensors such as pressure plates, humidity & temperature sensors
- Fully programmable timed sequences including delay, interval timer, exposure count & exposure length setting
- Shutter release button with autofocus, single & continuous shooting & bulb mode
- Connect wirelessly to camera using the Captur Receiver (sold separately)
Construction:The Captur Module Pro and the IR Transmitter are encased in rubber shield that covers the unit with the exception of the display and control face. Each has a 1/4 20 thread that lets you mount the units on a tripod, light stand or clamp. The IR Transmitter mounts inverted to protect it from the elements. The Capture Receiver is not rubber encased. Module Pro: The face of the unit has the display window, three buttons - Lock, Trigger and Start/Stop. Blow these is the four way rocker and a center “set” button. The left side has the cameras cable release port and the auxiliary port. The top has the microphone, IR sensor and Light sensor. The right side has a micro USB port that can be used to power the device, and the on/off switch. Note the micro USB port is covered by the rubber enclosure. The underside of the unit has the 1/4 20 mount and the battery compartment also accessible by removing the upper enclosure.
 The Module IR has a high/low switch on the front face and the 1/4 20 mount. The IR bean is emitter from the top of the unit.he On/Off switch is located on the left side and the batter compartment is in the bottom also covered by the rubber enclosure.
 The Capture Receiver has a flash hot shoe on the face a test button and an indicator light that flashes green when the unit is ready and turns red when the unit is activated. The left side has the remote trigger cabe port while the right has the On/Off switch. The bottom of the unit has a combination hotshot mount and a 1/4 20 mount. Also on the bottom is the battery compartment. Note: this unit does not have a rubber enclosure.Using the units:The handheld remote controller can be connected to your camera with a remote cable or wireless is used with the wireless receiver unit. The controller will allow you to configure various shooting scenarios that require precise delays and also works as an intervalometer for time-lapse photography. Unlike the Giga T Pro, Captur Module Pro will work as a conventional flash trigger in addition to the remote triggering functionality when paired with a Captur unit.The control unit has settings for Hours, Minutes and Seconds (HH:MM:SS) and a mode delay of 00:01 through 10:00 seconds (duration in 1/100th second). A 4 way rocker for modes and a central push button for setting the parameters. Buttons for triggering, start/stop and lock. There are four configurable options:
- Delay - lets you set an interval between the time the trigger is fired and the shutter is activated.
- Long - allows you to set a long exposure duration - the camera must be set to bulb mode. It is also possible to do long exposures without programming. This is achieved by depressing the release button for 3 seconds and the bulb function will lock and you can release the button. Depress the button once more to end the bulb exposure (long exposure).
- Interval 1 - is configured to set the interval between shots and then N1 sets the number of shots to take.
- Interval 2 configures the time between interval (Interval 1) activation sand N2 configures the number of times the Interval 1 and N1 sequence is repeated.
Using the Captur Module pro is easy if you are familiar with the Gia T Pro system. There is an online manual that is reasonable week detailed for those who have not used a Giga system or are new to Remote triggers and intervalometers.Configuring for various modes:All modes have some common options: sensitivity, amount of delay before the unit will trigger the shutter, the duration of shutter open when the camera is in bulb mode and the number of allowed activations. To enable a mode all you need to do is to press the Start/Stop button to start the process. A ready LED turns green and when the mode is triggered the LED turns Red as a verification.To set the mode, use the rocker switch to get to the sensor mode you want. The modes are in the following order:Sound mode- adjust the sensitivity of the sensor as needed.Infrared (IR) mode, (you need to use the Module - IR). Set the Module - IR and the Module - Pro so they are aligned with the IR beam lens in line-of-sight with the receiver window of the Module Pro. When the IR beam is interrupted the unit will be triggered. The Module IR has High/Low setting. Use the low setting for a beam length of 4.5 feet or less and the High for lengths greater than 4.5 feet.Light Mode - here the sensor is activated when there is a change in light level - bright to dark, dark to bright. Ideal for fireworks, lightning, or indoors with any light being turned on or off.Laser - this mode requires a laser beam to be pointed at the receiver window and works the same way as the IR beam but with a much greater distance between transmitter and receiver.AUX - this mode requires you to connect any triggering device to the Captur Module Pro via a 1/8” Tip-shield plug.Pricing:The Captur Pro Module is $120, Two receiver modules are $45 each; A pair of flash triggers not reviewed are $100 and the Capture Timer Module also not reviewed is $60.Conclusion:In my opinion the Captur system is probably the most versatile triggering system I have used and as it uses AA batteries it will last through extremely long time-lapse sequences without having to worry about a premature shutdown. The construction is solid as is the performance. In all of the tests performed the unit did not miss-fire.
Martha's Vineyard - Memorial Day Weekend Workshop
 In case you’ve missed it, Adventures in Photography (AIP) has organized a 5 day/4 night workshop on Martha’s Vineyard over the Memorial Day Weekend where I will be instructing.This is rare opportunity for photographers and their non-photographer partners to share some quality time together.Photographers get to photograph the beauty and charm of this unique island community while their non-photographer partners explore the charming New England character of Martha’s Vineyard.Adventures in Photography (AIP) has reserved all of the Ashley Inn's 10 rooms from May 22nd until May 26th. We can accommodate 20 people based on double occupancy. The Ashley Inn is an upscale B&B and breakfast is included.We still have a few rooms available but expect that they will sell out.For a full description of this Adventure go CLICK HERE
Panasonic releases firmware version 2.1 for the Lumix GH4
Panasonic released version 2.1 on January 26, 2015. Had to wait and test it all before posting this. As with any firmware update, please follow all instruction and do so with care. Here is the excerpt from the Panasonic web site and the links to the update:
- Time code can be embedded to the HDMI output signal.
- Selectable in Motion Picture menu : [Time Code]>[HDMI Time Code Output]* Available when DMC-GH4 or DMW-YAGH are connected with the products of ATOMOS Global Pty. Ltd. or the products complying with the extended specifications of ATOMOS Global Pty. Ltd..
- RSS (Recording Start/Stop) signal can be embedded to the HDMI output signal.
- Selectable in Motion Picture menu : [HDMI Rec Output]>[HDMI Recording Control]* Available when DMC-GH4 or DMW-YAGH are connected with the products of ATOMOS Global Pty. Ltd. or the products complying with the extended specifications of ATOMOS Global Pty. Ltd..
- FHD at 30p/25p native output via HDMI is available while recording video in FHD at 30p/25p.
- Selectable in Motion Picture menu : [HDMI Rec Output]>[1080/30p Set.] or [1080/25p Set.]
- Playback performance of recorded 4K video is improved.
- [Time Lapse Shot] Program is fixed to start recording at the designated time even when [summer time] is set.
Iceland - February 28 to March 7
 With the exceptional Aurora Borealis activity in Iceland, I am doing a 1 week photo tour and workshop that will be exceptional.From the western peninsulas of Snæfellsnes and Reykjanes to the exceptional south coast including the exquisite black sand beaches and icebergs in Jökulsárlón and surrounding areas this trip is designed for all levels of photographers. This trip is limited to a maximum 7 participants.All Iceland photo tours and workshops in 2014 and 2013 were fully subscribed within days so please register as soon as possible.CLICK HERE FOR DETAILS
2015 First Quarter - One Day Workshops
 Wishing you and your families a Very Happy & Prosperous New YearThe One Day Workshops for the first quarter of 2015 have been posted.They are listed on the One Day Workshop PageORYou may go directly to the Registration Page to get details and register.All one day workshops include a Pizza Lunch
What else is in my bag and more - Part 2
Here are some additional items I find useful. Some for the bag and others that are just good to have.
- Remote Shutter Release (wired or wireless) - A must have for tack sharp photography. There are 5 types available:
- A wired version that physically connects to your camera with a cable. Good for most photography when you are close to your camera.
- An Infrared trigger that is used to trigger the shutter using an IR beam (this requires you to be in “line of sight” to the front of your camera. These are usually OEM products but a few third-party devices are also available. I find these limiting.
- A wireless radio trigger. This is a two unit device - one is mounted and connected to the camera and the other is the hand-held controller. Hahnel and Phottix are the ones I use.
- An iOS or Android wired trigger. The smart phone is physically connected to the camera to trigger the shutter.
- The IOS or Android trigger. Here you use your smart phone and connect to the camera in WiFi mode to control and trigger the camera.
- Filter wrench (pair) - These come in two sizes and based on the lenses you have you may want to get both sets. Amazing how screw-on filters just don’t come off. The plastic wrenches allow you to apply pressure at the right places and lever the filter off so easily. Adorama branded wrenches are less than $5 a pair.
- LED Head Lamp - a must have when you are in the dark. Always carry one in your bag.
- Intervalometer - A must have device if you do any timelapse. long exposure, or multiple exposure photography. From basic wired devices to wireless units these are made most cameras including ones that have built-in intervalometers. Phottix, Hannel, Canon all make great units. Promote Systems makes a product called Promote Control, one of the finest devices not just an intervalometer but a whole lot more. The Promote Control will do focus stacking, automatic brackets of up to 45 images, with up to 9.0 EV step between shots for HDR. It can even automatically step into Bulb for night-time HDR! More expensive than the others but the Promote Control is my first choice.
Flash Photography:
- Flash Gels Filter gels are a great way to modify the color of your light but more important, they can balance the color temperature to match the ambient light. Roscoe and Rogue make excellent gels. My personal choice is the full set with the case and elastic band from Rogue. The Rogue set is around $30.
- Rogue Flashbender - These flash diffusers and reflectors are the best I have used. The come in multiple sizes and when used with the front diffuser, that act like a small soft-box. The cam be molded to direct light as needed or rolled up to form a snoot. These start at $20 for the Flashbender bounce card..
- Rogue Grid - If you need more control with the direction of the light from your flash the Rogue Grid is an excellent tool. The design features stacking honeycomb grids that produce 16, 25 and 45 degree grid spots. In addition you can get a set of bells that match the shape of the grid collar. The grid is under $50 and the gels will cost under $30
- Kupo Off-Camera Flash Alli Clamp - The clamp has a jaw that can clamp onto items up to 1.57" thick. Rubber nubs on the inside of the clamp prevent damage to paint or furniture. The clamp has a 5/8" receiver for light-stands or a 5/8" stud for super clamps with matching receivers. The Alli Clamp is topped with a metal locking shoe mounted to a rotating ball for your flash. I use it to mount my flashes, action cams, video lights and any other objects that need to held in place. Cost under $50. A lighter version called the Kupo Alli Clamp is for under $15.
Macro and Close-up
- Focusing rails and racks - These are ideal for precise positioning of a camera in X and Y directional axes. These come in single axis (front to back adjustment and 2 axis where a left right adjustment is also possible. Prices range for under $100 to $600 plus.
- Diopters or Close-up filters - This is one of the least expensive method of doing close-up photography. These filters attach to the front of your lens allowing you to focus closer hence magnifying your subject. They are available in single and dual elect construction. I recommend the dual element as you will have better optics. Prices range from $30 and up.
- Extension tubes - If you like macro these will allow your lenses to focus closer to the subject. As they have no optical elements in there is no image quality degradation. Kenko extension tubes are what I have and love. They come in a set of 12mm, 20mm and 36mm. For the newer mirrorless cameras the tubes are in sets of two at 10mm and 16mm
- McClamp The Clamp - This clamps to a tripod leg and can hold such items as gray cards and 12" reflectors, and small delicate subjects in place. It has a 26" flexible arm with a spring-loaded clamp to hold your subject in place. Wimberly also makes a similar device and have a new version called the Plamp II. Both products are about $45.
- Light Tent or Cube - A great light modifier for your product photography, food photography and macro work. These come in various sizes and cost $40 and up.
- Triflip (Trigrip) 6 in 1 or 8 in 1 reflector/diffuser - The TriGrip from Lastolite has a triangular shape with a built-in handle that allows easy hand holding or for attaching to a stand.The TriGrip is 30" at its widest point and collapses storage. I prefer this to the typical round diffuser reflector kits.
A few for those who dabble with video:
- LED Light Panels - these come in various sizes - remember to get one that is disable and has the intensity you need for your kind of video shooting.
- Variable ND filter - for those bright days when you need to slow your shutter down and keep your aperture wide.
- Shotgun microphone - DSLRs are great at capturing video. The audio on the other hand really is pathetic. The minute in-built microphones are really bad. So get a good starter microphone. A shotgun mounts on the hot-shoe and connects to the mic input port of the camera. My choices for a starter microphone is the Rhode Video Mic Pro with the Dead Cat for around $210
Please use the comment link on the top of this post to share with us some of your special items.If you do plan on getting any of these items please use my affiliate links on the right column of this blog post or use the Products and Discounts Page for additional links.
Star-trails in the Southern Hemisphere
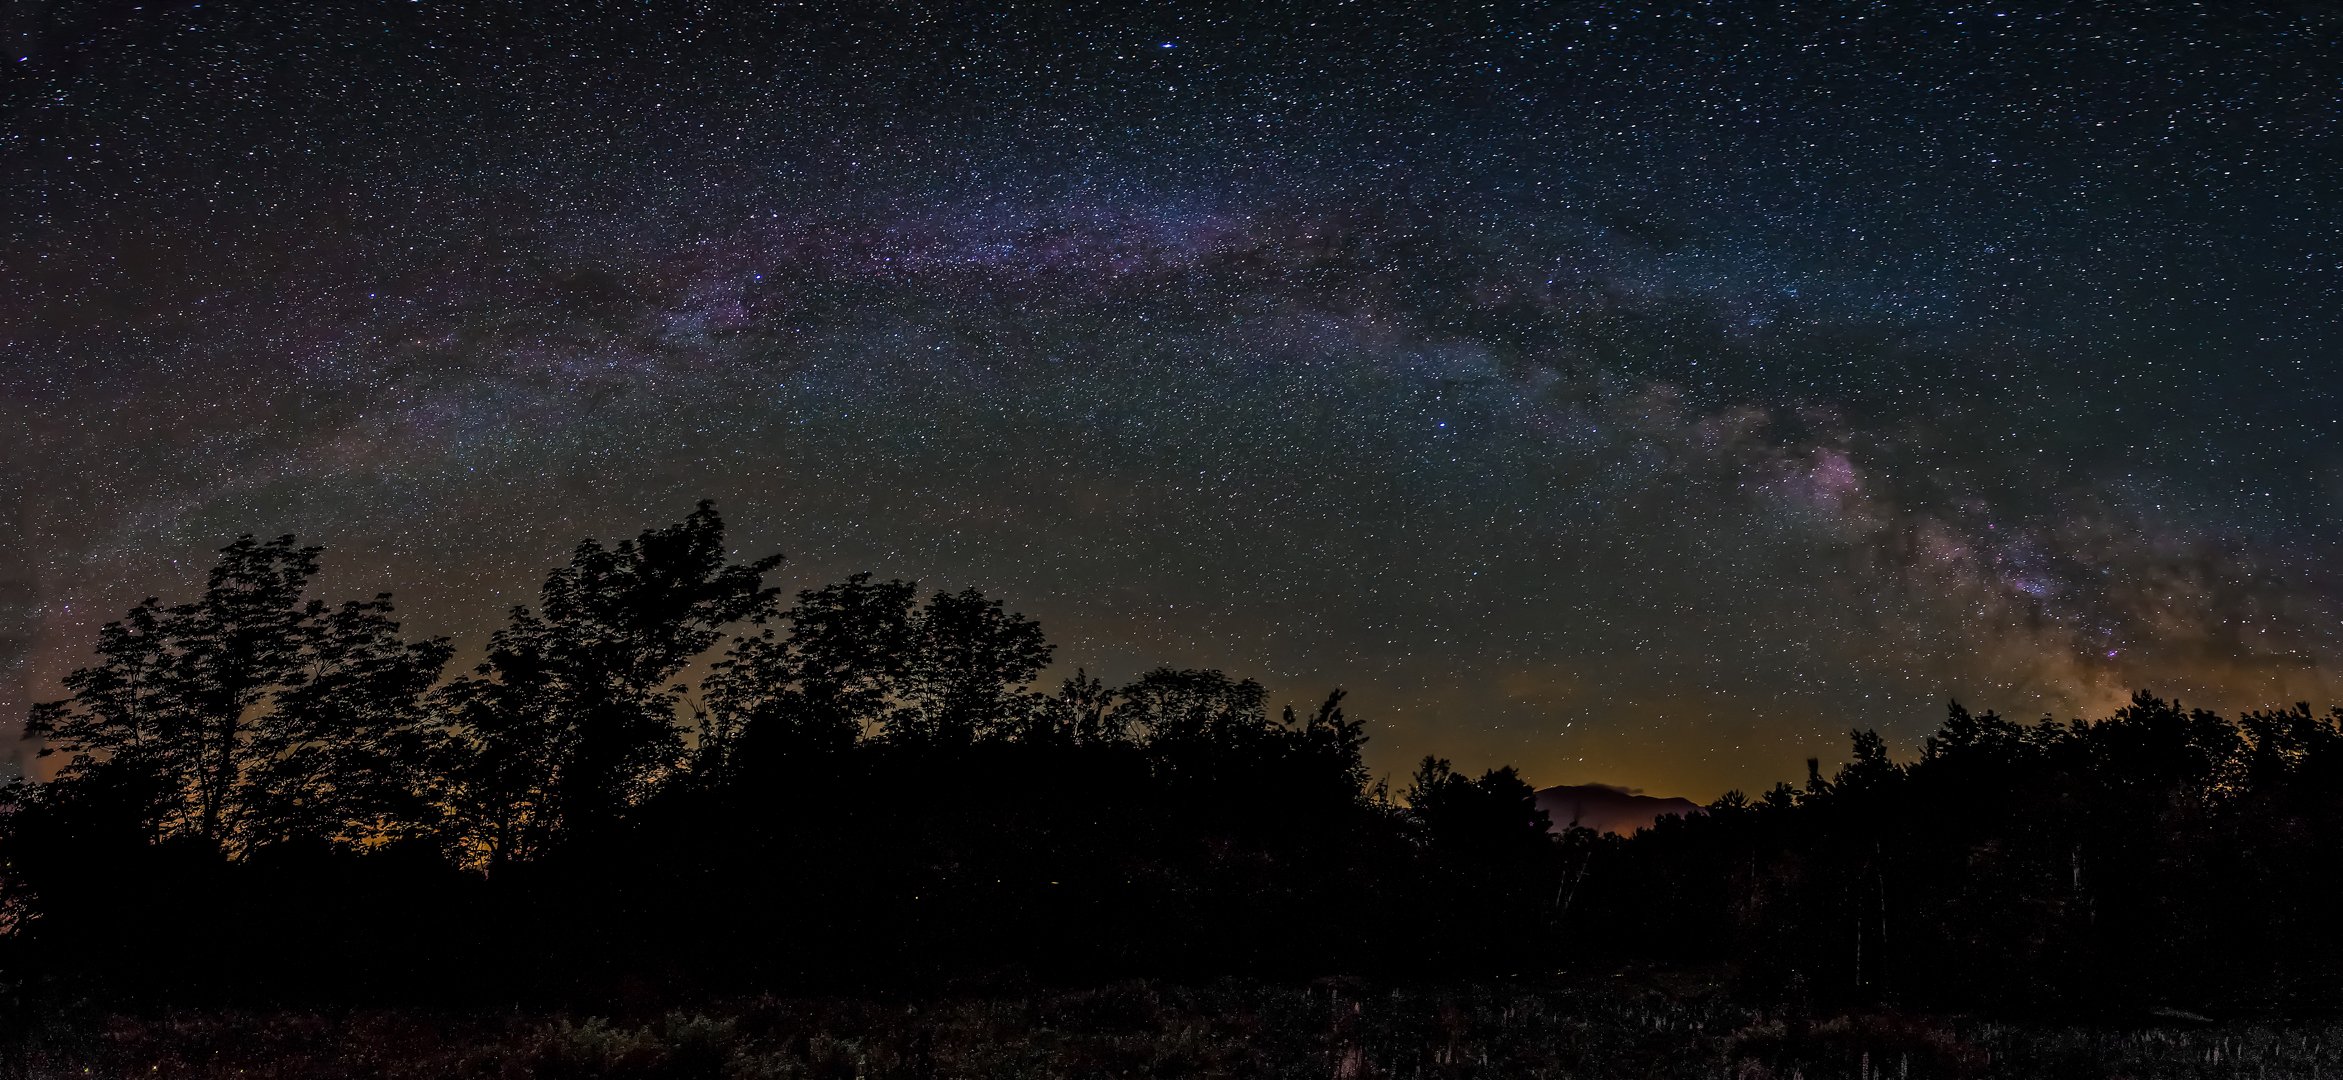
Finding Polaris or the North Star is easy in the Northern Hemisphere. In the Southern Hemisphere, finding Sigma Octantis is very difficult. The star lies in the constellation of Octans and has a magnitude of 5.5 making it barely visible even on a clear night. One can use the Southern Cross to make an attempt at locating its position but it will never be really accurate. I did my best and set up my cameras to do a time-lapse. This was the night Germany played Brazil in the World Cup.My tripod and camera must have aroused the curiosity of the night security guard at Eagle Island Camp. He kindly moved my rig to a more secure position on the tiles of the swimming pool. This was after 395 images had been captured with about 105 to go. Sequence disrupted but in my opinion the stack is interesting. Sigma Octantis is in the top left corner of the frame - INVISIBLE.Stars in Africa are incredibly bright as indicated by the EXIF data. These images were captured using the Panasonic Lumix GH4 and the 12 to 35 mm Lumix Vario lens. Exposure triad: f/2.8, 13 sec, ISO 200 - no noise reduction required.In hindsight, I should have added an ND filter and increased the exposure to 25 seconds or closed down the aperture to f/4. This would have extended the individual trails.Your comments would be appreciated.
Eldborg - A Time-lapse
This is a video of a time-lapse sequence captured on March 28, 2014 in Iceland. [video type="youtube" id="i5vXFrlGW08" width="600"]Default Message[/video]
Time-Lapse Imagery - Published
 I am so thrilled. My book is finished and is available in the Apple Store. It is an interactive iBook/e-Book that can be viewed using iBooks on a Mac or on an iPad.I am working on an interactive PDF version for all non Mac and iPad users. This should be ready in a week or so.
![]()
2014 - 1st Quarter One-Day Workshops
Here is the schedule for the first Quarter of 2014. Please use this REGISTRATION link for details about each workshop and to register.REMEMBER ALL ONE-DAY WORKSHOPS INCLUDE A PIZZA LUNCHJanuary 11 - Product Photography and Lighting TechniquesJanuary 12 – Food Photography and Lighting TechniquesJanuary 18 – Lighting for PortraitureJanuary 19 – Timelapse Photography, post processing and video assemblyJanuary 25 - Macro CloseupJanuary 26 – The Digital Darkroom – a course that covers capture to process and enhancement to output to print and web media. A one day program for digital image making workflowFebruary 1 – Flower Photography, Textures, Blending and moreFebruary 2 – Lightroom 5February 8 – HDR – done right using Photoshop, Photomatics, NiK HDR Efex 2, EnfuseFebruary 9 - Macro CloseupFebruary 22 – Timelapse Photography, post processing and video assemblyFebruary 23 - Photography Basics 1 day Class March 1 – Flash PhotographyMarch 2 – Lightroom 5If you have any questions or would like more information please call 617-759-0010 or email sv @ shivverma.com (please remove the spaces)
A Special Discount for LRTimelapse 3
 LRTimelapse 3 is one of the best time-lapse assembly software products available and works seamlessly with Photoshop Lightroom 5.For the remainder of 2013 and January 1, 2014 you can license or upgrade to any version of LRTimelapse for a 15% discount. This applies to upgrades and cross-grades too.A brief explanation of the options:
- If you still don't have any License, you can choose LRTimelapse 3 private and LRTimelapse 3 Pro. You can read about the differences here.
- If you have a LRT2 private license, you can get a discounted upgrade to LRT3 private or a discounted crossgrade to LRT3 Pro. For the latter, you will then save the cost of the update to version 3.
- If you have a license for LRT2 Pro (commercial), you will require the update to LRT3 Pro.
- If you already have upgraded to LRT3 private, you can crossgrade to Pro, if you need the advanced features.
Click Here and use the discount coupon code: XMAS2013LRT
Frederick Van Johnson of TWIP interviews me
So honored to have been interviewed by Frederick Van Johnson on Episode 339 of TWiP. If you have not subscribed to TWiP you must - it is one of the best Podcasts for photographers bar none.Click Here for a link to the podcastTWiP is available from iTunes as well as http://www.thisweekinphoto.com[video type="youtube" id="TEJ1XpaMbI0" width="400"]Default Message[/video]
2013 Remaining Workshops
There are a few spots available for the following:December 7, 2013 - Photography Basics 1 day Class December 8, 2013 - Time-Lapse WorkshopDecember 21, 2013 - Lighting WorkshopDecember 22, 2013 - Macro CloseupClick here for more info.Also checkout Iceland 2 and the India Tigers and More Workshops and Photo Tours. Click here.